Last updated on August 15, 2025
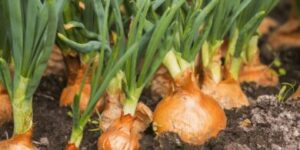
Many gardeners ask how to propagate onions like a seasoned pro, getting those beautiful, flavorful bulbs right from your garden. Perhaps you’ve tried growing onions from seeds or planting onion sets, only to feel lost in the sea of advice. You’re in the right place! I’m here to cut through the noise and share the methods of onion reproduction that truly work, backed by years of hands-on experience and expert insights. Forget the guesswork; we’re exploring the secrets of abundant onion harvests, ensuring you understand every trick in the book. This comprehensive onion growing guide will set you up for success!
Understanding Onion Propagation: The Basics
What Exactly is Onion Propagation, Anyway?
Onion propagation: The process by which new onion plants are created from a single onion, whether for home gardening or large-scale farming. At its heart, it’s simply how we create new onion plants, turning one into many. This process is incredibly significant in agriculture, ensuring a steady supply of this culinary staple. For us home gardeners, it means fresh, organic onions right at our fingertips, often saving a pretty penny too!
Why Should You Care About How Onions Reproduce?
Understanding the life cycle of Allium cepa, the common onion, is crucial. It’s a biennial plant, completing its life cycle over two years. In the first year, it focuses on growing that delicious bulb we love. The second year? That’s when it sends up a flower stalk to produce seeds. Knowing this helps us choose the best mode of propagation of onion for our goals. Do we want quick bulbs or a long-term seed supply? Your choice directly impacts your yield, the quality of your harvest, and even how long your onions will store. Trust me, a little biological know-how goes a long way here!



The Big Six: Effective Methods of Onion Propagation
Propagation by Seeds: The Long Game, Big Rewards
Getting Started: The Nitty-Gritty of Onion Seed Sowing
Onion seed propagation is a classic for a reason. You can either direct sow seeds right into your garden beds or start them indoors as seedlings for later transplanting. For direct seeding, I usually wait until the soil warms up to about 50−75°F (10−24∘°C). This ensures optimal germination, and honestly, it just feels right when the earth is ready. If you’re transplanting, I’d suggest starting those seeds indoors about 8−10 weeks before your last expected frost. Use a good-quality seed-starting mix. Please, don’t bury those tiny seeds too deep—just about a quarter-inch is perfect. It’s a delicate balance!
The Upsides & Downsides: What You Need to Know
The biggest advantage of starting from seed, in my book, is the sheer genetic diversity. You’ll find an incredible array of onion varieties, some with fantastic disease resistance. This means healthier plants and potentially fewer headaches down the line. However, it’s the long game; seeds take about 100−120 days to mature into full-sized bulbs. This method also demands a bit more patience and consistent care, especially during the delicate seedling phase. Think of it as a marathon, not a sprint, but the payoff in variety and quality can be truly exceptional. You’ll feel like a proud parent when those tiny green shoots emerge!
Propagation by Sets (Starter Bulbs): The Speed Demon’s Choice
Getting Started: Understanding and Planting Onion Sets
Onion sets, or starter bulbs, are essentially immature onion bulbs grown from seed the previous year. They’re harvested early, dried, and then sold for replanting. They’re a fantastic shortcut, a real time-saver if you ask me! Before planting, always make sure your seeds are firm and free of mold—nobody wants a mushy start. I typically plant them in early spring, as soon as the soil can be worked. Space them about 4−6 inches apart. Plant them just deep enough so the tip of the set is barely visible above the soil line. Good drainage is key here, so a well-draining, loose soil is your best friend. Trust me on this one!
The Upsides & Downsides: What You Need to Know
The main draw of sets? Speed! You’re looking at a much faster maturation period, often just 60−80 days from planting to harvest. They’re also incredibly easy to plant, making them a top choice for beginners or those short on time. However, there’s a catch: sets are more prone to bolting (sending up a flower stalk prematurely) if they experience temperature fluctuations. This diverts energy from bulb formation, giving you a smaller, tougher onion. Plus, your variety selection might be a bit limited compared to seeds. But for a quick, reliable crop, sets are hard to beat! I’ve had great success with them when I need a fast turnaround.


Propagation by Bulbs: Dividing for Double the Fun
Getting Started: Bulb Division Method
Sometimes, an onion bulb will naturally divide into multiple segments. This is particularly common with multiplier onions or shallots, but you can also encourage it with larger common onions. To propagate by onion bulb division, you’ll want to identify healthy parent bulbs that show signs of natural segmentation. Gently separate these segments, ensuring each piece has a bit of root and a growing point. Plant these individual segments just like you would an onion set, about 4−6 inches apart, with the top barely exposed. It’s surprisingly simple!
The Upsides & Downsides: What You Need to Know
This method offers a fantastic way to multiply your favorite onion varieties, especially those that readily form multiple cloves. It’s a relatively straightforward process. You’ll typically see new sprouts emerge quite quickly. The growth and development are usually robust, leading to good-sized bulbs. However, it requires a healthy parent bulb, and not all onion varieties are equally suited for this. You’re generally looking at a 90−110 day maturation period, similar to growing from offsets. It’s a great technique for expanding your existing stock without buying new seeds or sets. I find it incredibly satisfying to get more plants from what I already have!
Propagation by Offsets: Nature’s Little Helpers
What Are Offsets?
Onion offsets: Miniature secondary bulbs that form around the base of a parent onion bulb. They’re nature’s way of multiplying, and they often develop when conditions are favorable, particularly when the parent plant has ample space and nutrients. Think of them as tiny clones, ready to start their own lives! They’re like little gifts from your plants.
Getting Started: Harvesting and Planting Offsets
Harvesting offsets is pretty simple: once the parent bulb is mature and the tops begin to yellow and fall over, you can gently dig up the entire clump. Carefully separate the offsets from the main bulb. I usually plant these little guys immediately, giving them the same spacing and depth as onion sets. They’ll root quickly and start growing into new bulbs. This method is incredibly efficient for increasing your yield from a single plant. It’s a very forgiving process for gardeners of all skill levels. Honestly, it’s almost too easy!


Propagation by Bulbils (Top-Setting Onions): The “Walking” Wonders
Understanding Bulbils
Now, this is where things get really interesting! Some unique onion varieties, like the fascinating Egyptian onions (also known as top-setting onions or walking onions, Allium cepa var. proliferum), don’t produce seeds in the traditional sense. Instead, they form tiny aerial bulbs called bulbils at the top of their flower stalks.
Bulbils: Miniature onions that form at the top of a flower stalk, rather than underground. These bulbils are essentially miniature onions ready to sprout. Their natural “walking” propagation behavior occurs when the stalk falls over, allowing the bulbils to root where they land. Pretty neat, right? It’s like they’re taking a stroll across your garden!
Getting Started: Cultivation Practices for Bulbils
To cultivate these “walking onions,” you simply harvest the bulbils once they’ve matured and are easily detachable. They’ll look like miniature onion sets. You can plant them directly into the soil, just like regular sets, about 4−6 inches apart and barely covered. These onions are incredibly hardy and often overwinter well, providing an early spring crop. While their maturation period can be a bit longer, around 120−150 days, their unique growth habit and ability to self-propagate make them a low-maintenance and exciting addition to any garden. I highly recommend trying them for a bit of gardening novelty!
Propagation from Kitchen Scraps: The Ultimate Zero-Waste Hack
Getting Started: Regrowing Onions from Scraps
This is perhaps the easiest and most rewarding way to get a quick green onion fix, and it’s a fantastic way to minimize food waste! To start regrowing onions from scraps, simply take the bottom root end of a store-bought onion, leaving about a half-inch of the bulb attached. You can place this in a shallow dish of water, ensuring the root end is submerged but the top is exposed to air. Change the water every day or two. Alternatively, you can plant the bottom directly into a small pot filled with potting mix. It’s truly a no-brainer!


The Upsides & Downsides: What You Need to Know
Within a few days, you’ll see green shoots emerging—it’s incredibly satisfying! This method is perfect for a continuous supply of green onions for salads, stir-fries, or garnishes. While you won’t typically get large, mature bulbs from this method, you can often regrow green tops about 2−3 times before the quality diminishes. It’s a low-effort, high-reward technique for indoor cultivation. Just remember, they need plenty of light and consistent moisture to thrive. It’s a fun, practical way to experience onion propagation techniques firsthand, right on your windowsill! I always have a few going.
The Propagation Showdown: Which Method Works Best?
Comparing Onion Propagation Techniques: A Strategic Choice
Choosing the right onion cultivation method isn’t just about what’s easiest; it’s about what fits your lifestyle, your climate, and your gardening goals. Let’s break down how these different onion propagation techniques stack up against each other. Understanding these nuances can truly make or break your harvest. It’s a bit like picking the right tool for the job, isn’t it?
Success Rates and Difficulty: Your Green Journey
When we talk about onion propagation success rate, some methods are definitely more forgiving than others. Starting from seeds offers a moderate success rate, but it comes with a higher difficulty level. Why? Those tiny seedlings are delicate, demanding consistent moisture and light. Any misstep can lead to damping-off or leggy plants. On the flip side, planting onion sets boasts a high success rate and a surprisingly low difficulty. They’re already miniature bulbs, so they’re quite robust. In my experience, they’re a beginner’s dream.
For dividing onion bulbs and onion offsets, you’re looking at a high success rate with moderate difficulty. You’re essentially working with established plant material, which is a huge plus. However, you need to ensure the parent material is healthy. Bulbils offer variable success, often moderate in difficulty. Their unique nature means they might not always take root as uniformly as sets. Lastly, regrowing green onions from scraps has a moderate success rate and incredibly low difficulty. It’s almost foolproof for green onions, but getting a full bulb is another story.



Time to Harvest: How Long Until You’re Chopping?
Patience is a virtue in gardening, but some methods reward you faster! If you’re eager for a quick turnaround, onion sets are your best bet, maturing in just 60−80 days. This makes them ideal for succession planting or if you’ve got a short growing season. Regrowing onions from scraps also yields green tops quickly, usually within a week or two, though a harvestable “bulb” takes about 90−100 days if you’re aiming for that.
For a slightly longer wait, dividing onion bulbs and onion offsets typically mature in 90−110 days. This is still pretty efficient! The longest wait is with onion seed propagation, which can take 100−120 days. And if you’re venturing into the world of bulbils from Egyptian onions, prepare for the longest haul, often 120−150 days. Knowing these timelines helps you plan your garden calendar like a pro. It’s all about managing expectations!
Yield and Quality: The Ultimate Payoff
The method you choose significantly impacts your onion propagation yield and the overall quality of your harvest. Seed propagation generally offers the potential for the largest, most uniform bulbs, especially if you thin them properly. This also translates to a better storage life. However, if not thinned, you might end up with smaller onions. It’s a common rookie mistake, trust me.
Onion sets can produce decent-sized bulbs, but as I mentioned, they’re more prone to bolting, which can reduce bulb size and quality. When they do bolt, the bulb becomes tough and less palatable. Bulb division and offsets usually yield good-sized, healthy bulbs, especially if the parent plant was vigorous. With bulbils, you might get smaller bulbs initially, but they are incredibly hardy and self-sufficient. Finally, regrowing from scraps is primarily for green onions, so don’t expect a large, storage-worthy bulb from this method. It’s truly about continuous fresh greens.


Factors Influencing Propagation Success: Your Green Thumb Secrets
You’ve picked your preferred mode of propagation of onion, but that’s just one piece of the puzzle. Even the best method can fall flat without the right supporting cast. Think of it like baking: you can have the perfect recipe, but if your oven’s off or your ingredients are stale, you’re in for a disappointment. Let’s talk about the environmental factors that truly make your onions sing.
Soil and Nutrients: The Foundation of Flavorful Onions
First off, let’s get down to earth – literally! The right soil is non-negotiable for successful onion growth. Onions absolutely love well-draining, loose, and fertile soil. They’re not fans of heavy, compacted clay, which can stunt bulb development and lead to rot. I always aim for a sandy loam, rich in organic matter. This provides both good drainage and plenty of nutrients. It’s like giving them a five-star hotel to grow in!
When it comes to pH, onions are a bit Goldilocks: not too acidic, not too alkaline. They thrive in a slightly acidic to neutral range, ideally between 6.0 and 7.0. For more detailed information on optimal soil conditions, check out this guide from Utah State University Extension.
And what about food? Onions are heavy feeders! They need a steady supply of nutrients, especially nitrogen early on for lush green growth. This should be followed by phosphorus and potassium for robust bulb development. I typically incorporate a balanced organic fertilizer into the soil before planting. Then, I follow up with a nitrogen-rich feed about 3−4 weeks after planting, scaling back as the bulbs start to swell. For more on fertilization, the University of Minnesota Extension offers great advice. Remember, consistent feeding, not just a one-time dump, is key to truly magnificent bulbs. It’s all about feeding them right!

Climate and Environmental Conditions: Mother Nature’s Role
Next up, let’s talk about the weather. Onions are pretty adaptable, but they do have their preferences. For optimal growth and bulb formation, they generally prefer cooler temperatures during their initial growth phase. This might seem counterintuitive, but search snippets confirm that while warmth supports overall growth, proper soil conditions and warm temperatures ensure the “best growth” once established. However, for bulb development, they need consistent temperatures and ample sunlight. Aim for 6−8 hours of direct sunlight daily. Any less, and your bulbs might stay small. They’re sun worshippers, after all!
Moisture is also critical. Onions need consistent watering, especially during the early growth stages and when bulbs are forming. Irregular watering can lead to splitting or bolting. However, they hate soggy feet! Overwatering can lead to root rot and fungal diseases. So, find that sweet spot: moist but never waterlogged. It’s a delicate dance!
Understanding Onion Types: Short-Day, Long-Day, and Intermediate
Here’s a crucial factor that many new gardeners overlook, and it directly impacts your onion propagation success: day length. Onions are incredibly sensitive to the amount of daylight they receive, and this dictates when they’ll start forming bulbs. Choosing the wrong type for your region is a common reason for small or non-existent bulbs.
- Short-Day Onions: These varieties need about 10−12 hours of daylight to form bulbs. They’re perfect for southern regions (think USDA growing zones 7 and warmer) where winters are mild and spring days are shorter. If you try to grow these in a northern climate, they’ll just produce green tops and never bulb up properly.
- Long-Day Onions: On the flip side, long-day onions require 14−16 hours of daylight for bulb formation. These are your go-to onion varieties for specific climates in northern regions (USDA growing zones 6 and colder). They thrive in areas with long summer days.
- Intermediate-Day Onions: As the name suggests, these are the Goldilocks of the onion world, needing 12−14 hours of daylight. They perform well in middle latitudes, bridging the gap between short-day and long-day regions.
For a deeper look into selecting the right type for your area, I highly recommend checking out this excellent article on Understanding Short-Day vs. Long-Day Onions from Panhandle Agriculture (UF/IFAS) and another insightful piece from Nebraska Extension on Day Length and Onion Types. So, before you even think about when to plant onions, do a quick search for your onion growing zones and choose the best onion types for growing in your specific area. This day length sensitivity is a game-changer, I promise you!


Pest and Disease Management: Protecting Your Precious Crop
It’s always a bummer when pests and diseases crash your gardening party, but with onions, a little vigilance goes a long way. Common culprits include onion maggots, which can wreak havoc on young plants, and thrips, tiny insects that suck the sap from leaves, leading to silvery streaks.
My go-to preventative measures? Crop rotation is huge; don’t plant onions in the same spot year after year. Good garden hygiene, like removing plant debris, also helps. For onion maggots and thrips, you can find detailed management strategies on agricultural resources like Wikifarmer’s guide to Major Onion Pests and Diseases. Floating row covers can be a lifesaver for maggots, acting as a physical barrier. For thrips, a strong spray of water can knock them off, or you can use insecticidal soap for more severe infestations.
Fungal diseases like downy mildew and botrytis neck rot can also pop up, especially in humid conditions. Ensuring good air circulation by proper spacing, and avoiding overhead watering, can help prevent these issues. For more on diagnosing and controlling these onion diseases, check out Purdue Extension’s comprehensive guide. Additionally, Colorado State University Extension provides insights into soil-borne diseases of onion. If you do spot signs of disease, addressing them quickly with organic fungicides or by removing affected plants can save your crop. Staying on top of these issues is a crucial part of maximizing your onion propagation success. It’s like being a detective in your own garden!
Your Burning Questions: Onion Propagation FAQs Answered!
Can I Really Grow Onions From Those Leftovers in My Kitchen?
You bet your boots you can! It’s one of my favorite kitchen hacks. You absolutely can grow onions from store-bought onions, specifically from the bottom, root-end portion. I just cut off about an inch or so from the base, making sure those little root nubs are still intact. Pop it in a shallow dish with a bit of water, or even directly into some potting mix, and watch the magic happen. Within days, you’ll see green shoots emerging. It’s perfect for a quick, continuous supply of green onions, though getting a full-sized bulb this way is a bit more of a challenge. It’s a fantastic way to stretch your groceries!
When’s the Best Time to Get Those Onion Sets in the Ground?
Timing is everything, and this is a classic onion propagation FAQ! The best time to plant onion sets really depends on where you live. For most regions, early spring, as soon as the soil can be worked, is ideal. We’re talking late March to early April in cooler climates. However, in milder climates, you can actually plant them in the fall for an overwintering crop that gives you an early spring harvest. This is a neat trick for getting ahead! Always check your local frost dates to avoid a last-minute scramble. Believe me, I’ve learned this the hard way!
How Do I Keep My Onions From Bolting? It’s a Real Head-Scratcher!
Bolting is the bane of many an onion grower’s existence. Bolting: When an onion prematurely sends up a flower stalk instead of focusing its energy on bulb development. This can totally ruin your harvest. The key to preventing this is ensuring proper planting time and avoiding stress factors. For example, if you plant onion sets that are too large, they might think they’ve already gone through a growing season and try to flower. Also, sudden, drastic temperature swings—especially a cold snap followed by warmth—can trigger bolting. My advice? Use appropriately sized sets, plant them at the right time for your climate, and keep their growing conditions consistent. A little TLC goes a long way here. It’s all about keeping them happy and stress-free!
Are There Onion Varieties That Don’t Even Bother With Seeds?
That’s a fantastic question, and the answer is a resounding yes! Not all onions play by the traditional seed rules. The most famous example is the Egyptian onion, Allium cepa var. proliferum, which, as we talked about, is also known as a top-setting onion or walking onion. These unique beauties produce those adorable little bulbils at the top of their stalks instead of conventional seeds. It’s their clever way of reproduction in onions. They are incredibly hardy and fascinating to grow, offering a different kind of propagation adventure! You’ll be amazed by them!
So, How Many Times Can I Get a Harvest From My Kitchen Scraps?
It’s awesome to be able to regrow onions from scraps, isn’t it? However, there’s a limit to what these little guys can do. Typically, you can expect to get 2−3 good harvests of green onion tops before the quality starts to diminish. After a few rounds, the energy stored in that original bulb piece gets depleted, and the resulting greens become thinner and less flavorful. At that point, it’s best to compost the old scrap and start fresh with a new one. It’s all about enjoying those fresh, home-grown greens while making the most of your kitchen waste! Don’t push your luck too much!
Wrapping It Up: Your Path to Onion Abundance
Well, we’ve certainly covered a lot of ground today, haven’t we? Understanding how to propagate onions is truly a game-changer for any gardener. When it comes down to selecting the right onion cultivation method for you, it’s not a one-size-fits-all answer. You’ve got to consider your unique circumstances: your local climate, the resources you have available (time, space, money for seeds or sets), and, of course, what kind of yield you’re dreaming of. It’s your garden, your rules!
Are you in a rush for green onions, or do you have the patience for massive storage bulbs? Do you love the idea of perpetual harvests from your kitchen scraps, or are you looking for a long-term, self-sufficient solution like walking onions? Every mode of propagation of onion has its charm and its challenges.
Don’t Be Shy, Experiment!
My biggest piece of advice, and honestly, what makes gardening so much fun, is to embrace experimentation! Don’t be afraid to try a few different methods of onion reproduction. You might discover that while onion seed propagation gives you the most variety, planting onion sets is your go-to for a quick, reliable harvest. Maybe you’ll fall in love with the quirky charm of Egyptian onions and their bulbils, or find constant joy in regrowing onions from scraps. Trying multiple approaches can truly lead to optimal results and a deeper understanding of these amazing plants. It’s a journey of discovery, and I’m right there with you!
Final Tips for a Bumper Onion Harvest
So, as you venture forth on your onion propagation adventure, keep these final tips in mind. Regular monitoring of your plants is crucial; catch problems early, and you’ll save yourself a lot of grief. Proper spacing is non-negotiable for good bulb development—give those onions some elbow room! And finally, timely harvesting is key to getting the best flavor and storage life. Don’t pull them too early, but don’t leave them in the ground too long either.
I really hope this comprehensive look at Allium cepa propagation empowers you to grow the most incredible onions you’ve ever imagined. Happy gardening, my friends, and may your onion harvests be plentiful! What are your favorite onion propagation methods, or what’s got you scratching your head? Share your thoughts and questions below—I’d love to hear from you!
