Last updated on August 7, 2025
Have you ever wondered, “What is the mode of propagation of Irish potato?” It’s a question that pops up a lot—whether you’re a backyard grower or managing acres of farmland. And guess what? The answer is simpler (and more powerful) than most people think.
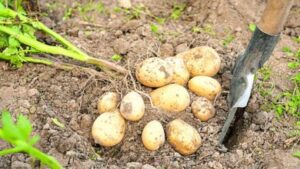
Irish potatoes are stem tubers, and they’re propagated through vegetative propagation using something called seed tubers. These are specially selected potato pieces (or whole small potatoes) that grow into new, identical plants—all without using seeds in the traditional sense.
Understanding this process isn’t just trivia—it’s the key to unlocking big harvests, healthier crops, and fewer headaches. Trust me, I’ve seen farmers transform their results just by getting this step right.


So before we dive deep into the science and strategy, here’s a quick snapshot of everything you need to know:
Quick Answer Box: Mode of Propagation of Irish Potato
What is the mode of propagation of Irish potato?
The mode of propagation of Irish potato is vegetative propagation, specifically through the use of seed tubers. These tubers grow into new plants without using true seeds.
What is the type of tuber in Irish potato?
Irish potato is a stem tuber. That means it forms from thickened underground stems, not roots. Each “eye” on the potato is a bud that can sprout into a new plant.
How are Irish potatoes propagated?
Irish potatoes are propagated by planting whole seed tubers or cut pieces that contain at least one healthy eye. These eyes sprout and grow into identical copies of the parent plant.
Why is Irish potato propagation called vegetative?
It’s called vegetative propagation because new plants grow from parts of the parent plant—like tubers—instead of from pollinated seeds. This method keeps the genetic traits of the original plant.
What is the scientific name of Irish potato?
The scientific name of Irish potato is Solanum tuberosum.
Bonus Tip:
Always plant certified, disease-free seed tubers for healthier plants and better yields. And don’t forget—those little “eyes” on the potato? That’s where the magic begins!
Why Does Irish Potato Propagation Matter So Much?
Effective Irish potato propagation isn’t just a fancy term; it’s the bedrock of successful potato cultivation. As successful potato farmer Mr. Mathidi wisely puts it, “Potatoes is a complicated product. If you don’t have a teacher, you will suffer. The crop needs far more care than many other vegetables, and it is easy to fail. I think this is why so many first-time potato farmers don’t make it – they underestimate what it takes to produce a crop.” [Source: Farmers Weekly, “Good advice and hard work tripled this farmer’s potato crop”]
Think about it: every single potato you harvest starts with how you propagate it. Poor propagation can lead to dismal yields, disease-ridden crops, and ultimately, a lot of wasted effort. Conversely, mastering these potato propagation methods means healthier plants, bigger harvests, and a more sustainable farming future. We’re talking about putting more food on the table, folks!
So, What’s the Deal with Irish Potatoes as a Crop?
The Irish potato, or Solanum tuberosum, is a global superstar. It’s a staple food for billions, offering vital carbohydrates, vitamins, and minerals. From crispy fries to comforting mashed potatoes, its versatility is unmatched. This humble tuber’s journey from a tiny “eye” to a bountiful harvest is fascinating. It all hinges on understanding the best ways of how to grow Irish potatoes. Let’s dig in and uncover the secrets to making your potato patch a roaring success!
The Heart of Potato Farming: Why Seed Tubers Reign Supreme in the Mode of Propagation of Irish Potato
When we talk about Irish potato propagation, the first thing that usually springs to mind is planting a piece of potato. And you’d be spot on! The most common and commercially viable method is indeed through seed tubers. This approach is often called vegetative propagation of potato or clonal propagation. It ensures that the new plants are genetically identical to the parent, maintaining desirable traits like yield and disease resistance. It’s like making a perfect copy every time! Understanding this primary mode of propagation of Irish potato is fundamental for any grower.


What Exactly Are Seed Tubers, Anyway?
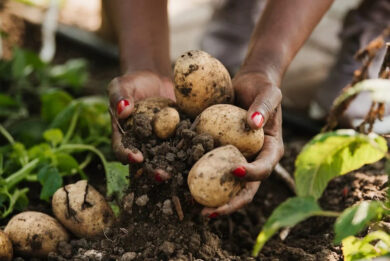
Seed tubers are simply potatoes specifically grown and selected for planting. They aren’t your average grocery store spuds, though they might look similar. These tubers are essentially swollen underground stems packed with stored food, ready to fuel new growth.
What’s the Role of “Eyes” and Sprouts in Potato Propagation?
The “eyes” on a potato are crucial because each contains several buds. Under the right conditions, these buds will awaken and form sprouting potatoes (chits). These chits are the beginnings of new stems and roots. Ever noticed those little indentations on a potato? Those are the potato eyes, and they’re crucial!
Why Does Physiological Age Matter for Potato Seed?
The physiological age of potato seed refers to the internal developmental stage of the tuber. It indicates its readiness for sprouting and growth, regardless of how long it has been stored. A young, “physiologically young” tuber might be dormant. An “old” one could be sprouting vigorously or even getting a bit wrinkly. Getting this age right impacts how quickly and uniformly your crop emerges.
Picking and Prepping Your Seed Tubers: A Masterclass in Potato Health
Alright, so you know what seed tubers are. Now, how do you make sure they give you the best start? This is where the real expertise comes in.


Why Are Disease-Free Seed Tubers Essential?
Disease-free potatoes are paramount. Planting infected tubers can introduce diseases like bacterial wilt, various viruses (such as Potato Virus Y or Potato Leafroll Virus), and late blight. These can decimate a crop, spread rapidly, and linger in your soil for years. Indeed, severe strains of viruses like Potato virus Y (PVY) and Potato leafroll virus (PLRV) have the potential to reduce potato yield by up to 80% in susceptible varieties if not managed properly.
This significant impact is consistently highlighted by experts, including those from the International Potato Center (CIP) in their research on potato health. [Source: Kreuze, J. F., et al. (2019). Viral Diseases in Potato. In: The Potato Crop. ResearchGate. Available at:
As Ward Upham, a horticulture expert at Kansas State University, emphasizes, “Be sure to buy seed potatoes rather than using those bought for cooking. Seed potatoes are certified disease-free and have plenty of starch to sprout as quickly as soil temperatures allow.” Always source certified seed tubers from reputable suppliers. It’s an investment, not an expense!
How Do I Break Potato Dormancy, and What Affects It?
To break potato dormancy, a period after harvest when the tuber won’t sprout, you need to provide specific environmental conditions. These include appropriate storage temperature, humidity, and light exposure. Potatoes have a built-in snooze button called potato dormancy. For instance, storing tubers at warmer temperatures (around 15-20°C or 59-68°F) for a few weeks can help break dormancy and encourage strong sprout development.



What’s the Ideal Size for Potato Seed Tubers?
The ideal size for individual seed tubers is between 40-80 grams (about 1.5 to 3 ounces). This size ensures enough stored energy for a strong plant without being so large they require cutting. When it comes to size, we’re looking for “just right.”
To Cut or Not to Cut: That is the Question!
You can plant whole small tubers, or you can cut larger ones into pieces. Ensure each piece has at least one or two healthy potato eyes.
- Advantages of Cutting: You get more planting material from fewer tubers, potentially reducing seed costs.
- Disadvantages of Cutting: Here’s the rub – cutting significantly increases the risk of disease spread if one tuber has a disease. There’s also a higher chance of the cut pieces rotting in the soil, especially if conditions are too wet or cold.
To help you weigh your options, here’s a quick comparison of the pros and cons:
| Aspect | Pros of Cutting Seed Tubers | Cons of Cutting Seed Tubers |
| Efficiency | Maximizes planting material from fewer large tubers, potentially reducing seed costs. | Requires extra labor and time for preparation. |
| Disease Risk | Allows for more plants from limited stock. | Significantly increases the risk of disease spread if tools are not sterilized. |
| Plant Health | Can encourage uniform sprouting if each piece has strong potato eyes. | Higher chance of rotting in the soil, especially in cold or wet conditions, impacting potato health. |
| Preparation | Requires careful suberization (curing) to form a protective layer over cut surfaces. | Improper curing can lead to moisture loss and vulnerability to pathogens. |
Why is Curing (Suberization) Important for Cut Seed Pieces?
Suberization: This process allows a protective layer of cork-like tissue to form over the cut surface, essentially healing the wound. If you do decide to cut your seed tubers, you absolutely must cure them. Expose cut pieces to warm (12-18°C or 54-64°F), humid conditions (85-90% relative humidity) for 2-3 days. This significantly reduces moisture loss and, crucially, prevents rotting and disease entry when planted. It’s a small step that makes a huge difference in potato health.



Key Takeaways for Seed Tuber Preparation:
- Always source certified disease-free potatoes.
- Break dormancy appropriately for uniform sprouting.
- Aim for 40-80 gram seed tubers.
- If cutting, ensure each piece has eyes and perform suberization.
Beyond the Tuber: Exploring Alternative Potato Propagation Methods
While seed tubers are the reigning champions of Irish potato propagation, they aren’t the only game in town. Sometimes, for very specific reasons like breeding new varieties or ensuring ultimate disease control, we turn to other fascinating potato propagation methods. These alternatives might not be for every commercial grower, but they’re absolutely vital to the future of potato farming. Each different mode of propagation of Irish potato offers unique advantages.
What is True Potato Seed (TPS)? The Botanical Path Explained
True Potato Seed (TPS), also known as botanical seed, refers to the tiny seeds found inside the small, green, tomato-like fruits that form after a potato flower is pollinated. This results from sexual reproduction and leads to genetic variation. You might be surprised to learn that potatoes produce “true” seeds!
How Does TPS Work?
Unlike planting a tuber, which is a form of asexual reproduction, using TPS is sexual reproduction. You collect these tiny seeds, dry them, and then plant them just like you would any other vegetable seed. Each seed grows into a small plant that produces tubers. It’s a completely different ballgame!
How Does TPS Aid in Breeding New Potato Varieties?
TPS’s biggest superpower lies in creating genetic variation. This is incredibly valuable for plant breeders. It helps them develop new potato varieties with improved disease resistance, higher yields, or better adaptation to changing climates. When you plant a tuber, you get an exact clone. But with TPS, each seed carries a unique combination of genes from its parent plants.


What Are the Limitations of TPS for Commercial Growers?
The primary limitation of TPS for commercial growers is high variability in the resulting plants. This leads to inconsistent potato crops that are difficult to manage for efficient harvesting and marketing. Because of that genetic mixing, planting TPS means you’ll get a wide range of potato plants. Therefore, TPS is primarily used in breeding programs, not typically for direct commercial production of table potatoes.
What is Tissue Culture (Micropropagation) for Potatoes? The High-Tech Approach
Micropropagation is a technique that involves growing whole plants from very small plant tissue samples in a sterile, controlled environment. It allows for rapid and disease-free multiplication. Now, if you want to talk about cutting-edge Irish potato propagation, let’s dive into tissue culture potato, also known as micropropagation.
How Does Micropropagation Work in a Lab?
At its core, micropropagation involves taking tiny pieces of plant tissue – often just a few cells or a small nodal section – and growing them in a sterile, controlled environment. We’re talking about test tubes and petri dishes, not open fields! These tiny pieces are placed on a special nutrient media. This media provides all the sugars, hormones, and minerals they need to grow. The magic? You can get an incredibly high multiplication rate from a single parent plant.
What Are the Benefits of Potato Micropropagation?
The advantages of tissue culture potato are huge, especially for certified potato seed production.

- Disease-Free Plantlets: This is arguably the biggest benefit. By starting with a tiny, sterile piece of a healthy plant, we can produce plantlets that are completely free from viruses, bacteria, and fungi. This is a game-changer for potato health and preventing widespread crop failures.
- High Multiplication Rate: From one small piece of tissue, you can produce thousands, even millions, of plantlets in a relatively short period. This rapid multiplication is essential for quickly scaling up new, desirable varieties.
What is the Process of Tissue Culture for Potatoes?
So, how does it all happen?
- Initiation: A tiny piece of plant tissue (an explant) is taken from a healthy potato plant and sterilized.
- Multiplication: This explant is placed on a special gel-like nutrient media in test tubes or jars. Under specific light and temperature conditions, it starts to grow and multiply, often forming multiple shoots from a single nodal section.
- Rooting: Once enough shoots are produced, they are transferred to a different medium to encourage root development.
- Acclimatization: These tiny plantlets, once they have roots, are carefully moved from the sterile lab environment to a greenhouse. This is a delicate phase where they adapt to normal humidity and light.
- Field Planting: Finally, these healthy, rooted plantlets are ready to be planted in the field. They often produce mini-tubers which then become the foundation for certified potato seed programs.
How Does Tissue Culture Produce Certified Potato Seeds?
Micropropagation plays a pivotal role in creating certified potato seed programs worldwide. It provides the starting point for producing generations of disease-free planting material. This ensures that farmers receive high-quality, healthy seeds, leading to better yields and reduced reliance on chemical treatments. It’s a testament to how science helps us grow Irish potatoes more efficiently and sustainably.
The X-Factors: What Really Influences Potato Propagation Success?
You’ve got your chosen mode of propagation of Irish potato, whether it’s classic seed tubers or high-tech micropropagation. But here’s the kicker: even the best material can fall flat without the right supporting cast. Success in Irish potato propagation isn’t just about the seed; it’s about the environment, the variety, and how you handle your precious planting material. These are the unsung heroes that truly dictate your potato yield.
How Do Environmental Conditions Affect Potato Propagation?
The right environmental conditions are non-negotiable for thriving potato cultivation. Factors like soil temperature, drainage, altitude, and consistent rainfall directly influence sprouting, root development, and tuber formation. Let’s face it, we can’t control the weather, but we can certainly understand and work with it.
What are the Ideal Soil Conditions for Potato Growth?
For optimal potato growth, the soil temperature should ideally be between 7°C and 18°C (45-65°F). The soil should have a slightly acidic to neutral pH (5.0-6.5), good drainage, and rich fertility. Soil is where all the magic begins! If it’s too cold, growth will be sluggish, and your seed pieces might rot before they even get a chance. If it’s too hot, you risk weak sprouts and increased disease susceptibility.
What Are the Altitude and Rainfall Needs for Potatoes?
Irish potatoes generally thrive in cool to temperate climates, often found in higher altitude regions. They require a consistent supply of moisture (about 500-750 mm or 20-30 inches) throughout the growing season, especially during tuber bulking. Irish potatoes are surprisingly adaptable, but they do have preferences. This is because cooler temperatures are more conducive to tuber formation. Too little rainfall, and your yield suffers; too much, and you’re back to drainage problems.
What Are the Optimal Growing Temperatures for Irish Potatoes?
The overall optimal growing temperatures for the potato plant are crucial. Daytime temperatures between 18°C and 24°C (65-75°F) are ideal for foliage growth. Cooler night temperatures, around 10°C to 14°C (50-57°F), are perfect for tuber development. This temperature swing helps the plant focus its energy on building those delicious spuds underground.
How Do I Choose the Right Potato Variety?
Choosing the right potato varieties for your specific region and goals is like picking the right tool for the job – it makes everything easier!
How Do Dormancy Characteristics Affect Potato Varieties?
Different potato varieties have varying dormancy characteristics. This means some sprout quickly after harvest (short dormancy) while others take a long time (long dormancy). This impacts planting schedules and storage strategies. Remember potato dormancy? Knowing this helps you plan your planting schedule and storage strategies. For instance, if you’re in a region with a short growing season, you’ll want a variety with a shorter dormancy period.
Why is Disease and Pest Resistance Important in Potato Varieties?
Selecting varieties with inherent disease and pest resistance is important. It can significantly reduce your reliance on chemical interventions and save you from potential crop losses. This is a big one! Some varieties are naturally more resilient to common potato scourges like late blight, early blight, or scab. Checking with your local agricultural extension office for recommended resistant varieties is always a smart move. It’s like giving your crop a built-in shield!
Why is Local Adaptation Important for Potato Varieties?
Local adaptation is important for potato varieties. What thrives in one region might struggle in another. This makes it crucial to select varieties with a proven track record in your specific climate, soil type, and against prevalent pests. Not all potatoes are created equal. Local agricultural universities or experienced farmers in your area can provide invaluable insights here.
How Should I Store and Handle Potato Propagation Material?
You’ve invested in great seed material, and you’ve got the perfect spot. Now, don’t drop the ball on storage and handling! This phase is critical for maximizing your potato growing tips and ensuring a strong start.
How Can I Maintain Potato Seed Tuber Quality?
To maintain seed tuber quality, keep them in a cool, dark, and well-ventilated space. Avoid direct sunlight and excessive heat. These can lead to greening, bitterness, and premature, weak sprouts. Once you’ve got your seed tubers, their quality needs to be preserved. Proper storage is key until planting day.
How Can Temperature Manipulate Potato Dormancy?
You can manipulate potato dormancy through temperature and humidity. For example, use a period of “chitting” (pre-sprouting in diffused light at 10-15°C or 50-59°F) to encourage sturdy sprouts if tubers are still dormant. Alternatively, keep them cooler (2-4°C or 35-40°F) to extend dormancy. As mentioned, you can actually manipulate potato dormancy through temperature and humidity. It’s all about finding that sweet spot!
Why Should I Avoid Weak Sprouts from Old Potato Tubers?
You should avoid weak sprouts from old tubers. These long, stringy, pale sprouts indicate that the tuber has expended too much of its stored energy. This often results in weak plants and poor yields when planted. Ever seen those long, stringy, pale sprouts on an old potato in your pantry? Always aim for short, sturdy, green or purple sprouts, indicative of vigorous growth potential. It’s a clear sign your seed is ready to rock and roll!
Key Factors for Propagation Success:
- Environmental Conditions: Ensure ideal soil temperature, drainage, and adequate moisture.
- Variety Selection: Choose varieties with suitable dormancy characteristics, disease/pest resistance, and local adaptation.
- Material Handling: Properly store and prepare seed tubers, avoiding weak sprouts.
Getting Your Propagated Potatoes in the Ground: The Initial Steps to Success
Okay, you’ve selected your ideal seed tubers, understood the science behind the mode of propagation of Irish potato, and optimized your storage. Now comes the exciting part: getting those spuds in the ground and watching them flourish! This section focuses on the immediate steps after preparing your propagation material. It directly impacts initial establishment and ultimately, your potato yield.
How to Plant Potatoes: Step-by-Step Guide for Initial Establishment
For a successful initial establishment of your potato crop, follow these essential steps:
- Prepare Planting Site: Ensure your soil is well-prepared, loose, and well-drained. This is the foundation for healthy root development from your newly propagated material.
- Plant Seed Tubers: Place your seed tubers or cut pieces about 10-15 cm (4-6 inches) deep. Space them 20-30 cm (8-12 inches) apart within rows. Ensure rows are 75-90 cm (30-36 inches) apart. Orient any visible sprouts upwards for quicker emergence.
- Initial Water Management: Provide consistent moisture immediately after planting to encourage sprouting and initial root growth. Avoid waterlogging, which can lead to rotting of the newly planted material.
- Early Weed Control: Address weeds promptly around the newly planted areas. This prevents competition for resources as your potato sprouts emerge.
- Monitor Early Health: Regularly check your emerging plants for any signs of disease or pest issues. These could compromise the initial establishment of your propagated potatoes.
Initial Planting Action Steps:
- Site Prep: Ensure loose, well-drained soil.
- Planting: Bury seed tubers 10-15 cm deep, with proper spacing and sprout orientation.
- Initial Watering: Provide consistent moisture immediately after planting.
- Weed Check: Control weeds around new plantings.
- Health Monitor: Watch for early signs of disease or pests.
✅ TL;DR: Irish Potato Propagation at a Glance
- Irish potatoes are stem tubers propagated through vegetative propagation using seed tubers.
- Seed tubers are selected potatoes with healthy “eyes” that grow into new plants.
- This propagation method preserves genetics, ensures yield consistency, and avoids the need for true seeds.
- Alternative methods like True Potato Seed (TPS) and tissue culture exist, but are mainly used in breeding and disease-free seed production.
- For best results: use certified disease-free seed, handle tubers properly, break dormancy correctly, and monitor environmental conditions.
By mastering the propagation of Irish potatoes, you’re setting the foundation for stronger plants, bigger harvests, and healthier soil. Whether you’re planting for the first time or scaling up your operation, this is the knowledge that drives success.
The Grand Finale: Optimizing the Mode of Propagation of Irish Potato for Unbeatable Yield and Quality
So, we’ve journeyed through the incredible world of Irish potato propagation, from the fundamental seed tubers to the cutting-edge of micropropagation. What have we learned? It’s clear that mastering the mode of propagation of Irish potato isn’t just about planting a potato; it’s a strategic dance between science, nature, and careful management. And trust me, getting this dance right leads to a bountiful potato harvest and superior quality!
A Quick Recap: Key Propagation Methods
We’ve covered the main ways to grow Irish potatoes:
- Seed Tubers: This is the workhorse, the most common method of propagation of Irish potatoes. It’s all about using healthy, properly prepared tubers with strong potato eyes and sprouts. Remember the importance of disease-free potatoes and the magic of suberization if you cut them.
- True Potato Seed (TPS): While not for everyday commercial use due to high variability, TPS is a vital tool for breeders. It helps create new potato varieties with improved traits through genetic variation.
- Tissue Culture (Micropropagation): The high-tech hero! This method produces pristine, disease-free plantlets at an incredible rate. It’s crucial for generating certified potato seed and ensuring top-tier potato health across the industry.
Best Practices for Irish Potato Growers: My Top Tips
If you want to maximize your potato yield and quality, here are my best potato growing tips, straight from the field, with a focus on propagation and initial establishment:
- Start Clean: Always, always, always use certified potato seed. It’s your first line of defense against devastating diseases. Don’t skimp here!
- Know Your Soil: Test your soil! Understand its pH, drainage, and fertility. Amend it as needed to create that perfect environment for your spuds’ initial growth.
- Choose Wisely: Select potato varieties that are well-suited to your local climate and have resistance to common pests and diseases, especially those that impact early growth from propagated material.
- Handle with Care: Pay attention to the physiological age of potato seed and proper storage. Avoid those weak sprouts from old tubers like the plague!
- Water Smart (Early Stages): Consistent moisture is key for sprouting and initial establishment. But remember, good water management for optimal growth means avoiding waterlogging.
- Stay Vigilant (Early Stages): Implement proactive weed management strategies and keep an eye out for pests and diseases that can affect young, newly propagated plants. Early detection can save your crop!
What’s Next? Future Trends in Irish Potato Propagation
The world of potato farming is always evolving. What’s on the horizon for Irish potato propagation?
- Enhanced Breeding: Expect continued advancements in traditional breeding and biotechnology. We’ll see even more resilient potato varieties that can thrive in challenging conditions, resist new diseases, and offer enhanced nutritional value.
- Precision Agriculture: Technologies like drones and sensors will play a bigger role in monitoring crop health, soil conditions, and water needs. This will allow for even more precise and efficient propagation and cultivation practices.
- Sustainable Practices: There’s a growing emphasis on environmentally friendly methods. This includes developing varieties that require less water or fewer inputs, and further refining biological pest control.
- Aeroponics and Hydroponics: While still niche for commercial potato production, growing potatoes in air (aeroponics) or nutrient-rich water (hydroponics) is gaining traction, especially for mini-tuber production in controlled environments. These methods offer incredibly high yields and disease control.
Ultimately, the future of the mode of propagation of Irish potato is bright. As planting season approaches, remember these insights to give your potato crop the best possible start. By embracing best practices and staying informed about new innovations, we can continue to ensure this incredible crop feeds the world for generations to come. What are your thoughts on these methods? Have you tried any alternative propagation techniques? Share your experiences below!
FAQs: Your Burning Questions About Irish Potato Propagation, Answered!
Got more questions about how to grow Irish potatoes or the best potato propagation methods? You’re not alone! Here are some common questions I hear all the time, with straightforward answers to help you on your way to a fantastic potato yield.
Can I plant grocery store potatoes?
No, it is strongly advised against for serious potato cultivation. Grocery store potatoes are not certified disease-free and can introduce viruses or diseases to your soil. Always opt for certified potato seed from a reputable supplier.
What’s the best time to plant Irish potatoes?
The ideal planting time usually depends on your local climate. Generally, plant after the last frost, when soil temperature has warmed to at least 7°C (45°F) and is consistently rising. This ensures quick sprouting and reduces rotting risks.
How do I know if my seed tubers are ready for planting?
Look for sturdy, short, green or purple sprouting potatoes (chits) emerging from the potato eyes. These indicate a good physiological age of potato seed. Avoid tubers with long, stringy, pale sprouts.
Is cutting seed tubers always a bad idea?
Not always, but it carries risks. Cutting can be economical for large seed tubers to maximize planting material. However, proper suberization (curing) of cut pieces is essential to prevent rotting and reduce the risk of disease spread.
What’s the biggest challenge in Irish potato propagation?
Managing diseases, especially late blight and various viruses, is often the biggest hurdle. Environmental factors like inconsistent rainfall or extreme temperatures also pose significant challenges to potato yield.
How long does it take for Irish potatoes to grow?
The growing season for Irish potatoes typically ranges from 90 to 120 days. This depends on the potato varieties chosen and local environmental conditions.
Can you plant store-bought Irish potatoes?
It’s not recommended. They may carry diseases or be treated with sprout inhibitors.
How long does it take for Irish potatoes to grow from seed tubers?
Typically 80–120 days depending on variety and climate.
Can you use true potato seed at home?
Yes, but expect variation in plants. It’s usually used in breeding, not food production.
