Last updated on June 25, 2025
Imagine harvesting abundant, delicious Irish potatoes, even with limited space! Planting Irish potatoes in sacks is a game-changing method for urban gardeners. It’s also perfect for anyone seeking an easier, more efficient way to grow these versatile tubers. This smart, space-saving strategy makes harvesting a breeze and helps control pests and soil-borne issues.
What You’ll Learn in This Guide:
- Why growing potatoes in sacks is a brilliant idea for any gardener.
- How to choose the best sacks, seed potatoes, and soil mix for optimal results.
- A step-by-step walkthrough of planting and the crucial “hilling” technique.
- Expert tips for watering, fertilizing, and protecting your potato plants from pests and frost.
- The secrets to knowing when and how to harvest your homegrown bounty.
- Essential advice for storing your potatoes to enjoy them for months.
- Answers to frequently asked questions and common troubleshooting scenarios.
Why Bother Growing Irish Potatoes in Sacks?
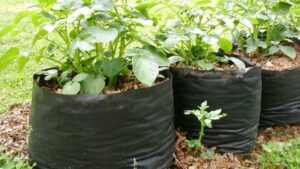
So, why are we talking about sacks instead of traditional garden beds? Believe me, there are some compelling reasons. For starters, it’s all about maximizing your real estate. Whether you’re in a bustling city or just have a small backyard, growing Irish potatoes in sacks means you can transform any sunny spot into a productive potato patch. I’ve personally seen incredible yields from such small footprints!


Furthermore, think about the harvest. No more back-breaking digging! When your potatoes are ready, you simply tip the sack. Voila! Your spuds are right there, clean and ready for the kitchen. This method also gives you a leg up on pest control. Many common soil-borne diseases and nematodes, like eelworm, are less likely to bother your crop when it’s contained. It’s a clean slate, if you will, offering a healthier environment for your plants to thrive.
And for my friends in Nigeria, you might be wondering, “Can Irish potatoes grow in Nigeria using this method?” Absolutely! Irish potatoes, while often associated with cooler climates, can certainly be grown successfully in various regions of Nigeria. This is especially true with careful attention to planting times that align with cooler, rainier seasons. This sack method provides excellent control over soil conditions and moisture. This is crucial for success in diverse Nigerian climates. It truly opens up possibilities for local food production. For instance, in Plateau State, where the climate is cooler and rainfall is consistent, this method can thrive. You can grow your own ‘Dankali’ right at home!
Gearing Up: What Do You Need for Sack Potato Success?
Alright, let’s talk shop. Before you dive headfirst into planting potatoes in sacks, you need to gather your supplies. The right materials make all the difference, trust me.
Which Sacks Should You Choose?
First up, the sacks themselves. You’ve got options here, but quality matters.


- Types of Sacks: Think burlap sacks, dedicated grow bags (often made from thick, breathable fabric), or even repurposed strong fabric sacks. For my Nigerian audience, this includes common cement bags or the sturdy Bagco bags readily available in the market. I’ve even used old compost bags and large buckets successfully! The key? They need to be sturdy enough to hold a lot of soil and moisture without tearing.
- Is Drainage Important? This is non-negotiable. Proper drainage is absolutely vital. Without it, your potato tubers will rot faster than you can say “spud.” Make sure your chosen sack has plenty of drainage holes at the bottom. If you’re using a cement bag or a Bagco bag, simply use a sharp knife or scissors to cut several small holes, about four to six quarter-inch holes, evenly spaced on the bottom. This allows excess water to escape.
- Does Sack Size Matter? Don’t skimp on size! For optimal growth, each sack should be at least 5 gallons, ideally with a 14-inch diameter and 15 inches deep. Some experts suggest 50-quart sacks, or roughly 8 liters of growing medium per plant, for maximum yield. In my experience, bigger is often better for bigger spuds!
- How many potatoes can you put in a potato sack? This is a common question. Generally, I recommend planting 3-5 seed potatoes per sack. If you’re using smaller sacks, aim for about 1 seed potato per 10 liters (or 2.5 gallons) of volume. Overcrowding leads to smaller tubers, and nobody wants that!
How Do You Select Your Seed Potatoes?
Your potatoes are only as good as their start. So, picking the right seed potatoes is crucial.
- How to Choose Healthy Starts: Always opt for certified seed potatoes from a reputable supplier. Why certified? They’re guaranteed to be disease-free. This is a huge win for your garden. Using grocery store potatoes can introduce diseases into your soil. Trust me, that’s a headache you want to avoid. For my Nigerian growers, look for certified seed potatoes from agricultural research institutes like the National Root Crops Research Institute (NRCRI) in Umudike, or reputable agricultural supply stores in major farming hubs. You can also find reliable certified seed potato sources, often through agricultural suppliers like Fedco Seeds or Agrico.
- What is “Chitting” and Why Do It? This little trick can significantly boost your harvest. “Chitting” simply means sprouting your seed potatoes before planting. Lay them out in a cool, bright, frost-free spot—like an egg carton on a windowsill—until they develop short, stubby, green or purple shoots about 1 inch long. This gives them a head start. I’ve seen a noticeable difference in early growth when I take this step!
- Should You Cut Your Seed Potatoes? If your seed potatoes are large, you can cut them into golf-ball-sized pieces. Just make sure each piece has at least one or two “eyes” (those little dimples where sprouts emerge). After cutting, allow the pieces to “callus” for 2-3 days in a dry, open area. This forms a protective layer, preventing rot once planted. I usually just leave them on a tray in my garage.
What’s the Best Growing Medium for Your Potatoes?
The soil mix is perhaps the most critical component for successful growing potatoes in sacks.
- What’s the Ideal Soil Composition? Potatoes love well-drained, light, and loose soil. It should be rich in organic matter. This provides the perfect balance of moisture retention and aeration for tuber development.
- What’s My Recommended Mix? I always suggest a blend of high-quality potting soil and compost. A good ratio is often 50% potting soil and 50% compost. For my Nigerian audience, you can easily find compost from decomposed plant matter, animal manure (like cow dung or poultry droppings), or even create your own from kitchen scraps. Mixing in some local topsoil, if it’s light and not heavy clay, can also work well. When I scoop it, it feels fluffy and smells earthy—that’s how you know it’s good!
- What pH Do Potatoes Prefer? Irish potatoes are a bit particular; they prefer slightly acidic soil, ideally with a pH between 4.8 and 5.5. This helps prevent common issues like potato scab. For more detailed information on soil requirements, university extension services like Utah State University Extension often provide comprehensive guides.
- Should You Avoid Garden Soil? While a small amount mixed with potting soil and compost is fine, relying solely on garden soil for your sacks isn’t a great idea. It often has poor drainage, can harbor pathogens, and might be loaded with weed seeds. Stick to a well-amended mix. I’ve learned this the hard way with compacted, unproductive soil!
- Should You Add Slow-Release Nutrients? To give your plants a steady supply of food, consider adding an organic, slow-release fertilizer to your initial mix. Chicken manure pellets are a fantastic option. They provide a gentle, consistent feed as your potatoes grow. Always follow the product’s instructions for application rates.
Step-by-Step Guide: How to Plant Irish Potatoes in Sacks
Now that you’ve got your gear, let’s get our hands dirty! Follow these steps for a smooth planting process.
When is the Best Time to Plant Your Spuds?
Getting the timing right is crucial for a successful potato harvest.


What’s the Sweet Spot for Planting? Generally, you want to plant Irish potatoes in sacks about two weeks before your region’s last expected frost. This often falls in early spring, typically between March and May in many temperate zones. The soil needs to be warm enough to encourage growth, but you want to get them in before the summer heat kicks in. I usually check my local extension office’s planting calendar.
When to Plant Potatoes in Sacks in Nigeria? For my Nigerian growers, timing needs a local twist. While the general principle of avoiding extreme heat remains, you’ll want to adapt to your specific climate and rainy seasons. For example, in the northern parts of Nigeria, the cooler dry season (October to March) with irrigation, or the early rainy season (April to June), might be ideal. In the south, the major rainy season (April to July) or the short rainy season (September to November) could work. This helps ensure consistent moisture without scorching heat. Always check local agricultural advisories, or you can read my post on which month is the best to plant SWEET potatoes, or resources like AyosifamHub for the most precise planting windows in your specific state or region, as they often highlight the importance of agricultural extension services.
How Do You Start the Initial Planting?
This is where the magic begins! Let’s get those chitted seed potatoes into their new homes.
Should You Place Drainage Material First? While your sacks should have plenty of drainage holes, some folks like to add a thin layer of drainage material at the very bottom. This could be a few crocks, broken terracotta pieces, or even some broken polystyrene. It’s not strictly necessary if your soil mix is good, but it can offer extra peace of mind.
How Much Soil Do You Add Initially? Start by adding about 4-6 inches of your prepared soil mix to the bottom of the sack. This creates a cozy bed for your seed potatoes.
How Do You Position Your Seed Potatoes? Carefully place your chitted seed potatoes (or cut pieces) on top of this initial soil layer. Make sure the “eyes” or sprouts are facing upwards. Spread them out evenly, giving each potato a little personal space. Remember, don’t overcrowd the sack!
How Do You Cover Them Up? Gently cover your seed potatoes with another 1-4 inches of your soil mix. This initial covering protects them and kickstarts their growth. Now, give them a good, gentle watering to settle the soil.
What is Hilling (Earthing Up) and Why is it Important?
This is perhaps the most important technique for maximizing your potato yield in sacks. Don’t skip it!
What is Hilling (Earthing Up)? Hilling is the process of gradually adding more soil around potato plant stems as they grow taller. This encourages more tuber formation. It also prevents sunlight from reaching the developing potatoes, which can cause them to turn green and become toxic. I once skipped a hilling, and bam—green potatoes!
When Should You Start Hilling? You’ll want to begin the hilling process when your potato plants are about 6-8 inches tall. This is when they’ve established themselves and are ready for their first layer of added soil.
How Do You Hill Like a Pro? As your plants grow, you’ll gradually add more soil or compost to the sack. Cover the lower leaves and leave only the top few inches of foliage exposed. Keep adding soil until the sack is nearly full. This might mean folding up the sides of your grow bag or even a Bagco bag as you go, creating a taller column of soil.
How Often Should You Hill? This isn’t a one-and-done job! You’ll need to repeat the hilling process every week or two as the stalks continue to grow. It’s a continuous effort to keep those new tubers covered and happy.
Are There Alternatives to Soil for Hilling? While soil and compost are excellent, you can also use other materials for hilling. Straw or leaf mulch is fantastic alternative. They not only encourage tuber growth but also help keep the soil cooler and suppress weeds. This can be especially beneficial in hotter climates.
How Much Sunlight Do Potatoes Need?
Just like us, potatoes thrive on sunshine!
Where Should You Place Your Sacks for Sunlight? Your potato sacks need a prime location. Aim for a spot that receives at least 6-8 hours of direct sunlight per day. Think of it as their energy source for producing delicious tubers. I always look for the spot that gets morning sun and afternoon sun, if possible.
Why is Full Sun Important for Tuber Growth? Don’t underestimate the power of full sun. Adequate sunlight is essential for robust tuber growth. Without enough light, your plants will be weak, and your potato yield will be disappointing. So, pick your sunniest patio corner or balcony spot!
Care and Maintenance for Irish Potatoes in Sacks: How Do You Nurture Your Crop?
Now that your potato plants are cozy in their sacks, it’s time to talk about keeping them happy and healthy. Proper care is what separates a decent harvest from an amazing one!
How Do You Water Your Irish Potatoes in Sacks?
Watering seems simple, right? But for potatoes, it’s all about balance—not too much, not too little, but just right.
- What’s the Key to Consistent Moisture? Your goal is to maintain consistently moist soil, but never soggy. Potatoes hate “wet feet,” which can lead to rot. Think of it like a well-wrung sponge: damp, but not dripping.
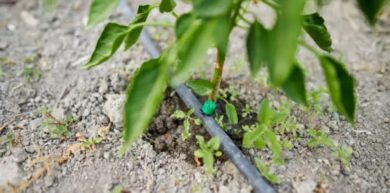
- How Often Should You Water? This depends on your climate and the type of sack you’re using. In hot, windy weather, you might find yourself watering daily. In cooler periods, every few days could be enough. The best way to check? Stick your finger about an inch or two into the soil. If it feels dry, it’s time to water. I check mine every morning! For my Nigerian friends, consider using simple drip irrigation systems or even recycled plastic bottles with small holes to ensure slow, consistent watering, especially during dry spells. Collecting rainwater during the rainy season is also a smart move!
- Why is Deep Watering Important? When you do water, make it count. Water deeply until you see water draining from the bottom of the sack. This ensures the moisture reaches all the developing tubers. Shallow watering only wets the top layer, leaving the deeper roots and tubers thirsty.
- When are Water Needs Critical? Pay extra attention to watering when your potato plants start to flower. This period is critical for tuber formation and sizing. If the plants get stressed from a lack of water during this time, your yield will suffer.
- When Should You Stop Watering? As your potato plant’s foliage begins to wilt, yellow, and eventually die back (a sign that harvest is approaching), you can gradually reduce and then stop watering. This helps the potato skins “set” and toughen up, which is crucial for good storage.
How Do You Fertilize Your Potatoes?
While you added slow-release fertilizer at planting, your hungry potato plants will appreciate a little extra love as they grow.


- What Kind of Liquid Fertilizer Should You Use? I recommend using a diluted liquid fertilizer, like fish emulsion, every couple of weeks. This provides a gentle, readily available nutrient boost without overwhelming the plants. Always dilute according to the product’s instructions. For Nigerian growers, locally available organic options like compost tea or diluted animal urine (from healthy livestock) can also provide excellent nutrients.
- Should You Avoid Excessive Fertilizer? Here’s a pro tip: potatoes don’t like overly rich soil, especially too much nitrogen. Excessive nitrogen encourages lush leafy growth at the expense of tuber development. So, resist the urge to go overboard with the fertilizer! A balanced approach is best.
How Do You Manage Pests and Diseases?
One of the great benefits of growing potatoes in sacks is reduced exposure to soil-borne issues. However, you still need to be a hawk for other common problems.
- How Do You Monitor for Common Potato Pests? Keep a close eye out for common potato pests like Colorado potato beetles or other chewing insects. Inspect the undersides of leaves regularly. If you spot any, hand-pick them off, or use organic pest control methods if the infestation is severe. I do a quick patrol every few days. For Nigerian farmers, common pests like potato tuber moth (“kwa-kwa” in some local dialects) or aphids can be problematic. Regularly checking your plants and using neem oil spray (derived from the neem tree, common in Nigeria) can be effective organic deterrents.
- How Do You Prevent Blight? Blight, particularly late blight, can be a real heartbreaker for potato growers. It’s a fungal disease that spreads quickly. If you notice any signs—dark, water-soaked spots on leaves that quickly turn brown and crispy—act fast. Cut down and destroy any affected foliage immediately. Do not compost it, as this can spread the disease. Good air circulation around your plants also helps prevent blight. For more detailed information on blight prevention, resources from university extensions like UMN Extension or University of Connecticut IPM can be very helpful.
- What are the Benefits of Container Growing for Pest/Disease Control? Remember, one of the biggest advantages of potato sack gardening is freedom from many soil-borne pests and diseases, like eelworm and scab, which can plague traditional garden beds. This gives your potatoes a healthier start and less stress throughout their growing cycle.
How Do You Protect Against Frost?
Unexpected late frosts can be a real buzzkill for young potato plants.
- How Do You Cover Young Plants During Late Frosts? If a late frost is predicted after you’ve planted, quickly cover your young plants with an extra layer of soil or straw. Even a light blanket or row cover can do the trick. This provides just enough insulation to protect tender new growth. I keep an old sheet handy just for this!
- Can You Grow Potatoes in Sacks Over Winter? For those in milder climates, or if you want to push the season, you might consider growing potatoes in sacks over winter. This usually involves moving the sacks to a protected location like a shed, garage, or greenhouse. Just ensure they still get some light and aren’t exposed to hard freezes. In very cold climates, overwintering isn’t typically feasible, but it’s a fun experiment for others!
Harvesting and Storage of Irish Potatoes from Sacks: The Grand Finale!
Alright, my fellow potato enthusiasts, this is the moment you’ve been waiting for! All your hard work culminates in this glorious phase: harvesting your homegrown spuds. And trust me, with the sack method, it’s a piece of cake!
When to Harvest Your Potatoes?
Knowing when to harvest is just as important as knowing how to plant. Patience is a virtue here, but don’t wait too long either!


- What are the Signs of Readiness? Your potato plants will give you clear signals when they’re ready. First, you’ll see them flower—a beautiful sight, really! After flowering, the most crucial sign is when the foliage (leaves and stalks) starts to wilt, yellow, and eventually turn brown and die back. This means the plant has put all its energy into forming those delicious tubers underground.
- When Can You Harvest Young Potatoes? If you’re craving those tender, thin-skinned “new potatoes,” you can actually harvest them earlier. About 2-3 weeks after flowering, you can gently reach into the side of the sack (if it’s a grow bag with a flap) or carefully dig around the edges to “rob” a few young spuds without disturbing the main plant too much. These are fantastic boiled or roasted!
- How Do You Allow Skins to Set for Main Crop? For your main crop, the potatoes you want to store, it’s vital to let their skins “set.” This means waiting about two weeks after the foliage has completely died back. This curing period allows the skins to toughen up, which significantly improves their storage life and prevents bruising. If you harvest too early, the skins will be thin and easily damaged.
- When to Harvest Potatoes in Sacks: Timelines by Type: Different potato varieties mature at different rates.
| Potato Type | Maturity Time (Weeks After Planting) | Examples |
| First Earlies | 10-12 weeks | ‘Duke of York’, ‘Sharpe’s Express’ |
| Second Earlies | 13-16 weeks | ‘Charlotte’, ‘Nicola’ |
| Maincrop | 18-20+ weeks | ‘Desiree’, ‘King Edward’ |
What’s the Easiest Harvesting Technique?
This is where the sack method truly shines. Forget digging trenches!
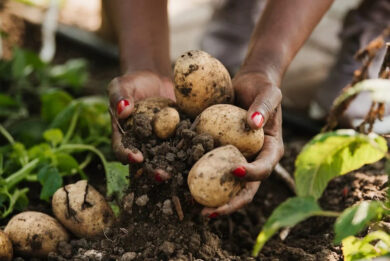
- What’s the Tipping Method? This is, hands down, the easiest way to harvest. Once the foliage has died back and the skins has set, simply tip the entire sack onto a tarp, a large sheet, or even directly onto your lawn. Then, gently sift through the soil mix, and voila! Your potatoes will be revealed. It’s like a treasure hunt, but with edible gold!
- How Do You Avoid Damage to Tubers? Be careful not to bruise or cut the tubers during harvest. Use your hands, not sharp tools. Damaged potatoes won’t store well and are prone to rot. Treat them gently, like the precious gems they are.
How Do You Cure and Store Your Harvest?
You’ve got your beautiful potatoes—now let’s make sure they last! Proper curing and storage are essential.
- Should You Brush Off Dirt or Wash Potatoes? After harvesting, gently brush off any excess dirt from your potatoes. Do not wash them. Washing can introduce moisture and encourage rot during storage.
- How Long is the Curing Time? Lay your brushed potatoes out in a cool, dark, well-ventilated spot for a few days to a week. This “curing” period allows any small nicks or bruises to heal and further toughens the skin. A shed, garage, or even a covered patio works well, as long as it’s out of direct sunlight and rain.
- What’s the Perfect Storage Spot? Once cured, store your potatoes in a cool (around 45-50°F or 7-10°C), dark, frost-free, and well-ventilated location. Baskets, paper bags, or mesh bags are ideal, as they allow for air circulation. For Nigerian households, a cool, dry pantry, a well-ventilated shed, or even under a bed in a cool room can work, as long as it’s dark and has good airflow. Avoid storing them near heat sources or in humid areas.
- Why Should You Avoid Polythene Bags? This is a big no-no. Never store potatoes in sealed plastic or polythene bags. They cause “sweating,” which traps moisture and leads to rapid spoilage and rot.
- Should You Discard Green Potatoes? Any potatoes that have turned green must be discarded. As mentioned earlier, greening indicates the presence of solanine, which is toxic. It’s a clear sign they were exposed to sunlight, highlighting why hilling is so important! Better safe than sorry.
Frequently Asked Questions (FAQ)
Even with the best intentions and careful planning, gardening sometimes throws us a curveball. But don’t you worry, I’ve got answers to some of the most common questions to keep your potato sack gardening journey smooth and successful.
Q: Why are my tubers so small?
A: Small tubers often result from overcrowding in the sack. Too many seed potatoes compete for limited nutrients and water, leading to stunted growth. Inconsistent watering and nutrient deficiencies can also be culprits.



Q: My potatoes are turning green! What gives?
A: Green potatoes indicate sunlight exposure during growth. This causes them to produce solanine, a toxic compound. Proper hilling (earthing up) is crucial to keep tubers covered and prevent greening.
Important Disclaimer: Green potatoes contain solanine, a toxic compound. Do not consume green parts of potatoes. Always discard any potatoes that have turned green.
Q: Why are my potatoes misshapen?
A: Misshapen potatoes usually stem from inconsistent watering. Erratic moisture levels cause uneven growth, leading to odd shapes, cracks, or hollow centers. Overly compacted soil can also restrict tuber development.
Q: Can I use regular potatoes from the grocery store as seed potatoes?
A: I strongly advise against it. Grocery store potatoes are often treated with sprout inhibitors and may carry diseases. Always use certified, disease-free seed potatoes from a reputable supplier for the best results.
Q: How often should I fertilize my potato plants in sacks?
A: After initial planting, apply a diluted liquid fertilizer (like fish emulsion) every couple of weeks. Avoid excessive nitrogen, as it promotes leafy growth over tuber development.
Q: What’s the best way to protect my sack potatoes from pests?
A: Regularly inspect your plants for common pests like Colorado potato beetles. Hand-picking works for small infestations; otherwise, consider organic pest control. Good air circulation also helps deter issues.
Q: Can I grow potatoes in sacks in a partially shaded area?
A: Potatoes need at least 6-8 hours of direct sunlight daily for robust tuber growth. Partial shade will likely result in a significantly smaller yield and less developed tubers. Choose your sunniest spot!
Q: How long does it take to grow potatoes in sacks?
A: Maturity varies by type: First earlies are ready in 10-12 weeks, second earlies in 13-16 weeks, and maincrop varieties take 18-20+ weeks. Always check your specific variety’s maturity dates.
Q: Can I reuse the soil from my potato sacks for next year?
A: It’s best to refresh your sacks with new potting mix and compost each season. Reusing the same soil can lead to nutrient depletion and disease buildup. Old soil can be added to your compost pile or other garden beds.
Ready to Dig In? Your Potato Growing Journey Awaits!
Well, there you have it, my friends! We’ve covered everything from choosing the perfect sack to harvesting your glorious spuds, and even tackled some common questions. Planting Irish potatoes in sacks isn’t just a trend; it’s a practical, rewarding, and incredibly fun way to bring fresh, homegrown produce right to your kitchen. Whether you’re a seasoned gardener with limited space or a complete newbie looking for a manageable project, this method truly opens up a world of possibilities.
I’ve seen firsthand the joy and satisfaction that comes from pulling those first potatoes from a grow bag. It’s a moment of pure gardening magic, a tangible reward for your efforts. And remember, every gardener, even the most experienced, has their share of small tubers or a green potato or two. It’s all part of the learning curve! The key is to keep observing, keep adapting, and keep enjoying the process.
So, what are you waiting for? Grab some sacks, get your seed potatoes chitting, and let’s get those spuds growing! You’ll be amazed at the bounty you can achieve. Have you tried growing Irish potatoes in sacks before? What are your biggest tips or challenges? Or perhaps you’re just about to embark on this adventure? Share your thoughts and questions in the comments below—I’d love to hear from you and learn from your experiences! Happy gardening!
