Last updated on May 11, 2025
Last summer, I nearly gave up on a patch of kale that refused to grow. The leaves stayed small, turned yellow fast, and looked like they’d rather be anywhere else. Sound familiar? Well, I gave that bed one last shot—with a DIY fertilizer made from fermented fish scraps and banana peels. Two weeks later? That kale bounced back like it had something to prove.
That’s the power of nitrogen—and you don’t need store-bought solutions to get it.
Homemade high nitrogen fertilizers are my not-so-secret weapon for lush, vibrant, fast-growing plants. And the best part? You probably already have most of the ingredients sitting in your kitchen or backyard.


In this guide, I’ll walk you through my top DIY nitrogen boosters—everything from the classic (like grass clippings and coffee grounds) to the surprisingly potent (like urine tea, fermented food waste, or even a little fishy brew I call “stink soup”). Yep, we’re going there. And I promise, the results are worth the smell.
Why All the Fuss About Nitrogen?
Nitrogen isn’t just another nutrient—it’s the nutrient that drives leafy growth. It fuels chlorophyll, the stuff that lets plants turn sunlight into energy. No nitrogen? No green leaves, no strong stems, no happy plants.
If you’ve ever seen your plants yellowing from the bottom up or just sitting there, barely growing—that’s nitrogen deficiency waving a red flag.
What makes nitrogen tricky is that it doesn’t stick around. It washes out of soil quickly, especially after heavy rain or irrigation. That’s why gardens, especially veggie beds, need regular nitrogen refills.


According to the University of Minnesota Extension, nitrogen is often the most limiting nutrient in the soil (UMN Extension, 2023). And most people don’t realize how easy—and affordable—it is to add it back in, naturally.
Why DIY Nitrogen Fertilizers Are a Game-Changer
Affordable and Accessible
You might wonder, “Why make your own fertilizers when store-bought options are so easy?” The answer is simple—it’s way more affordable! Instead of spending money on pricey chemical fertilizers, you can easily turn everyday items like coffee grounds, grass clippings, and food scraps into nutrient-rich plant food.
Better for the Environment
Homemade fertilizers are not only budget-friendly, they’re also better for the planet. Unlike chemical fertilizers that come in plastic bags and can pollute waterways, DIY fertilizers use natural ingredients that are much more eco-friendly. They break down harmlessly in the soil, making your garden healthier and reducing waste.
Tailored to Your Garden’s Needs
One of the best things about making your own fertilizers is that you can customize them for your plants. Whether you’re looking to boost nitrogen levels for leafy vegetables or create a slow-release formula for fruit trees, you can adjust your recipes to suit your garden’s unique needs.



Long-Term Soil Health
Over time, homemade fertilizers improve your soil’s overall health. While store-bought fertilizers can give plants a quick boost, they don’t help the soil in the long run. DIY options enhance soil structure, moisture retention, and nutrient availability—creating a thriving, sustainable garden.
Plus, making your own fertilizers connects you with your garden in a deeper way. It’s not just about growing food—it’s about understanding what your soil needs and learning how to give it back.
In the next section, I’ll break down the best natural, nitrogen-rich ingredients—some obvious, some weird, and some downright genius. You’ll learn how to spot them, how to prep them, and how to match them with your plant’s specific needs.
Let’s get into it!



Homemade High Nitrogen Fertilizers Ingredients – What You Need for DIY Nitrogen Fertilizers
Creating your own nitrogen-rich fertilizers is a simple, effective way to promote healthy plant growth. And the best part? You can do it without relying on expensive chemical products. But where do you find these nitrogen-packed resources? Let’s explore some of the best organic options that are readily available and full of nutrients your plants will love.
Grass Clippings: A Convenient and Effective Source
After mowing your lawn, don’t toss those grass clippings—they’re a nitrogen powerhouse. Fresh clippings typically contain around 2-4% nitrogen, making them perfect for your fertilizer mix.
The best part? Grass breaks down quickly, releasing nitrogen into the soil and feeding your plants. It also acts as a natural mulch, helping retain moisture. But be careful: if clippings are applied too thickly, they can become compacted. This could trap moisture and suffocate plant roots. Apply them lightly to get the most benefit.
Coffee Grounds: Kitchen Waste Transformed into Plant Food
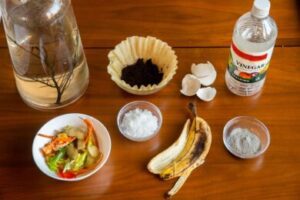
Did you know that the coffee grounds you toss after your morning brew are a fantastic source of nitrogen? They typically contain about 2% nitrogen. Plus, they’re packed with organic matter that improves soil structure.



Coffee grounds are also slightly acidic, which benefits acid-loving plants like tomatoes or blueberries. They decompose easily, offering a steady release of nitrogen over time. Simply sprinkle the grounds around your plants or add them to your compost. You can even brew “compost tea” with them, a nutrient-rich liquid that works wonders in the garden.
Animal Manure: A Time-Tested, High-Nitrogen Option
Manure has been used for centuries as a fertilizer. But not all manures offer the same nitrogen levels. For instance, chicken manure contains around 1.5-2.5% nitrogen, making it an excellent choice for plants that need a nitrogen boost.
However, fresh manure can be too strong and may burn plant roots. To avoid this, compost the manure for a few months before applying it. This will reduce its intensity, making it a safe, nutrient-rich option for your garden.
Fish Emulsion: The Aquatic Fertilizer
Fish emulsion is a nutrient-rich liquid fertilizer made from fish byproducts. It contains about 5% nitrogen, along with other essential elements. It’s great for plants that require a steady, slow-release source of nutrients.


Fish emulsion also helps improve soil structure. However, it has a strong odor right after application, which might not be for everyone. To minimize the smell, apply it early in the morning or late in the evening. Mixing it with other organic matter can also help reduce the odor.
Blood Meal: A High-Impact, Concentrated Fertilizer
When you need a powerful nitrogen boost, blood meal is an excellent choice. Made from dried animal blood, it contains an impressive 12-15% nitrogen. It’s ideal for plants that need an extra punch of nitrogen during their peak growing season.
However, because of its high concentration, blood meal must be used carefully. Too much can cause nitrogen burn and damage plant roots. To avoid this, mix it thoroughly into the soil or compost. This ensures a controlled release of nutrients and prevents over-application.
Sustainable Fertilizing with Nitrogen-Rich Materials
Finding nitrogen-rich materials for your homemade fertilizer doesn’t require complex processes or pricey products. From grass clippings (2-4% nitrogen) to blood meal (12-15% nitrogen), these organic options are both accessible and effective. Whether you’re using kitchen waste like coffee grounds or more traditional materials like manure, you’re giving your plants the nutrients they need for strong growth.


By choosing the right nitrogen source and using it correctly, you can build a healthier, more sustainable garden. Not only will your plants thrive, but you’ll also reduce the environmental impact of synthetic fertilizers.
If you have any favorite nitrogen sources or tips for creating your own fertilizers, I’d love to hear your thoughts! Let’s keep the conversation going and continue learning together.
How to Make High Nitrogen Fertilizer Homemade – DIY Recipes for High Nitrogen Fertilizers
Creating your own nitrogen-rich fertilizers is not just cost-effective; it’s also a sustainable way to boost plant health. Whether you’re looking to improve your garden’s soil or enhance growth in potted plants, homemade nitrogen fertilizers are an eco-friendly option that’s both simple and effective.
In this section, I’ll break down several DIY recipes for high-nitrogen fertilizers, including compost tea, manure tea, fish emulsion, and blood meal applications. I’ll also share expert tips on preparing them so they’re most effective for your plants.


Compost Tea: Brewing Nutrient-Rich Liquid Feed
If you’ve heard of compost tea, you’re already familiar with its reputation as an all-around plant booster. It’s a liquid fertilizer made by steeping compost in water, creating a nutrient-packed solution. Compost tea is particularly great for improving soil health and enhancing nutrient uptake by plants, especially during the growing season.
Nitrogen Content in Compost Tea:
While the nitrogen content in compost tea can vary depending on the compost used, it generally ranges from 0.1% to 1.0% nitrogen. The strength of the tea will depend on the ratio of compost to water and the type of compost material you use.
For instance, compost made from grass clippings or manure will have a higher nitrogen concentration compared to vegetable scraps.
How to Make It:
- Gather Your Compost Materials: Start with a well-balanced compost mixture that includes greens (like vegetable scraps) and browns (such as dry leaves). Your compost should be mature—no longer hot or smelly.
- Brewing Process: Fill a mesh bag (a large burlap sack works well) with about 3-5 pounds of compost and steep it in 5 gallons of water for 24-48 hours. Stir the mixture every few hours to oxygenate the liquid and encourage microbial activity.
- Application: After brewing, strain the mixture and use the liquid to water your plants. Compost tea can be applied directly to soil or sprayed on plant leaves for a foliar feed.
Manure Tea: Traditional Liquid Fertilizer
Manure has been used for centuries as a natural fertilizer, and manure tea is a fast and effective way to harness its benefits.


It’s made by steeping manure in water, creating a potent, nutrient-rich liquid that’s full of nitrogen and other essential nutrients.
How to Make It:
- Choose the Right Manure: Chicken manure is particularly nitrogen-rich, containing about 1.5-2.5% nitrogen. Cow and horse manure are also good, but chicken manure provides the most immediate nitrogen boost.
- Steeping Process: Fill a mesh bag with manure and submerge it in a large container of water. Allow the mixture to steep for 1-2 weeks. Be sure to stir the contents daily to prevent any foul odors from building up.
- Dilution: Once the tea has brewed, dilute it with water—aim for a 1:5 ratio of manure tea to water, as it’s quite strong and can burn plant roots if used too concentrated.
- Application: Use the diluted tea to water your plants. Manure tea can also be sprayed as a foliar feed, especially during the growing season when nitrogen is crucial for plant development.
Fish Emulsion Fertilizer: Step-by-Step Guide
If you’re looking for a liquid fertilizer packed with nitrogen, fish emulsion is an excellent option. It’s made by fermenting fish and fish byproducts into a nutrient-rich liquid.
With around 5% nitrogen, fish emulsion is an effective, though potent, fertilizer that benefits a variety of plants.
Tip for Reducing the Odor:
Fish emulsion can have a strong smell, which isn’t always pleasant. To reduce the odor, add a small amount of wood chips or sawdust to the mixture during fermentation. These materials can help absorb some of the strong odor.
Alternatively, you can also add herbs like mint or lavender to mask the scent when applying.
How to Make It:
- Collect Fish Scraps: You can use any fish scraps (bones, skin, and heads) or purchase commercial fish emulsion. The key is to get high-quality, unsalted fish.
- Fermentation Process: Ferment the fish scraps in a sealed container for 1-2 weeks, stirring regularly. This process allows the fish to break down and release nitrogen and other nutrients.
- Storage and Usage: Once fermented, strain the liquid and store it in a cool, dark place. When applying, dilute the solution to prevent over-fertilizing—generally, a 1:10 ratio of fish emulsion to water works well.
- Application: Apply the diluted fish emulsion directly to the soil or as a foliar feed. It’s a great option for fast-growing plants like tomatoes, which can benefit from a consistent nitrogen supply.
Blood Meal Application: Safe Practices
When you need a quick and powerful nitrogen boost, blood meal can’t be beaten. Containing up to 12-15% nitrogen, blood meal is a concentrated fertilizer that works wonders for plants with high nitrogen needs, such as leafy greens.
How to Use It Safely:
- Determine Appropriate Quantities: Blood meal is potent, so it’s important to measure the right amount. Typically, 1-2 tablespoons per plant is sufficient, depending on the size of your plant.
- Soil Incorporation: It’s best to incorporate blood meal into the soil before planting or mix it into the top layer of soil during the growing season. Avoid applying it directly to plant roots, as the high nitrogen content can cause “burn.”
- Slow Release: Blood meal is a slow-release fertilizer, meaning it will continue feeding plants over a period of weeks. It’s perfect for long-term nitrogen supply.
Unlocking the Power of Homemade Nitrogen Fertilizers
DIY nitrogen fertilizers, like compost tea, manure tea, fish emulsion, and blood meal, are all excellent ways to boost your garden’s nitrogen levels without breaking the bank.
Each of these methods provides plants with the nutrients they need to thrive, promoting healthy growth and vibrant yields.
By using these recipes, you’re not only improving the health of your plants but also contributing to more sustainable gardening practices.
These natural fertilizers help build soil fertility over time and are free from the harmful chemicals found in many store-bought products.
Have you tried making any of these homemade fertilizers? Or maybe you have a favorite recipe of your own? Drop a comment and let’s chat about your gardening experiences!
Application Techniques for High Nitrogen Fertilizer Homemade
When it comes to applying homemade nitrogen fertilizers, there are several methods to choose from. Each technique has its own strengths, depending on the needs of your plants, the type of fertilizer, and the timing of application.
In this section, I’ll break down soil drenching vs. foliar feeding, timing and frequency of applications, and safety measures and best practices to help you make the most of your DIY fertilizers.
Soil Drenching vs. Foliar Feeding: Which is Best for Your Plants?
Soil drenching and foliar feeding are two primary ways of delivering nutrients to your plants, but they work in different ways.
- Soil Drenching: This method involves pouring the fertilizer directly onto the soil around the plant’s root zone. It’s one of the most common techniques for delivering nitrogen to the plant’s roots, where it is absorbed into the soil and gradually taken up by the plant’s roots. Soil drenching is especially effective for plants that need a steady supply of nutrients over time, like vegetables and perennials.
- Pro Tip: To get the most out of your soil drenching, apply it when the soil is moist but not waterlogged. This helps the fertilizer penetrate the soil without washing away. The roots will have easier access to the nitrogen and other nutrients.
- Foliar Feeding: In contrast, foliar feeding involves spraying the fertilizer directly onto the plant’s leaves. Plants absorb nutrients through their leaves more quickly than they do through their roots, which makes this method ideal for a quick nutrient boost. Foliar feeding is especially useful for addressing nutrient deficiencies during the growing season, as plants can uptake nitrogen and other nutrients in just a few hours.
- Pro Tip: For the best results, apply foliar fertilizers early in the morning or late in the afternoon when the stomata (small pores on the leaves) are open. Avoid applying during the hottest part of the day to prevent the fertilizer from evaporating too quickly or causing leaf burn.
Timing and Frequency of Applications: How Often Should You Apply Homemade Fertilizers?
When it comes to timing and frequency, homemade nitrogen fertilizers should be applied strategically to get the best results without overfeeding your plants.
Too much nitrogen can lead to nutrient imbalances and excessive growth, while too little can stunt plant development.
- Compost Tea and Manure Tea: These organic fertilizers can be applied once every two to four weeks, depending on plant needs and growth stages. Apply them more frequently when plants are actively growing or during their peak development phase, such as early spring or summer.
- Pro Tip: If you’re using compost tea, you can apply it once every 2-3 weeks, especially in warmer months when your plants are growing vigorously. It’s a gentle, slow-release fertilizer that enhances soil biology while providing steady nutrition.
- Fish Emulsion: This nitrogen-rich fertilizer can be applied every 2-3 weeks during the growing season, but be mindful of its strong odor. It’s best to use it early in the morning or late in the evening to avoid odors lingering during the day.
- Blood Meal: Because blood meal is a concentrated fertilizer, use it sparingly. Apply once in early spring before planting or mix it into the soil to provide a slow-release nitrogen boost. Avoid applying it too frequently to prevent plant burn.
Environmental Safety: Preventing Runoff and Protecting Ecosystems
When applying homemade fertilizers, it’s important to consider the environment as well. Excess nitrogen can lead to nutrient runoff, which can contaminate nearby water sources, harm aquatic life, and contribute to environmental issues like algae blooms.
Here are a few tips to minimize your environmental impact:
- Apply Fertilizer When It Won’t Wash Away: Avoid applying homemade fertilizers before heavy rainfall or in overly wet conditions. This helps prevent runoff into storm drains or waterways. Applying during dry conditions allows the fertilizer to stay in the soil where it’s needed.
- Pro Tip: If possible, use mulch or other soil amendments after applying fertilizers to help absorb excess nutrients and prevent erosion.
- Use Targeted Application: Instead of broadcasting fertilizers broadly, focus on applying directly around the root zone of plants. This minimizes the chance of nutrients washing away from the intended areas.
- Monitor Soil Health: Healthy soil with good structure and organic content can better hold nutrients, reducing the risk of nutrient loss. Regularly amend your soil with compost and organic matter to maintain a balance of fertility and improve water retention.
- Choose Eco-Friendly Fertilizers: Homemade fertilizers like compost tea or manure tea, which are slow-released and rich in organic matter, tend to have a lower environmental impact compared to synthetic fertilizers. Opting for these can help reduce the risk of over-fertilization.
Safety Measures and Best Practices: Protecting Your Plants and Yourself
While homemade fertilizers are an eco-friendly choice, it’s important to handle them properly to protect both your plants and yourself.
- Dilution is Key: When applying homemade fertilizers, always follow recommended dilution ratios. For example, fish emulsion can be very potent, so make sure to dilute it to a 1:10 ratio to prevent burning your plants.
- Pro Tip: When in doubt, start with a weaker concentration and increase it gradually. It’s always easier to give your plants more nutrients later than to reverse the damage caused by over-fertilizing.
- Wear Protective Gear: Always wear gloves when handling manure-based fertilizers like manure tea and blood meal. These can contain pathogens that might pose health risks. For extra protection, you may also want to wear a mask, especially when applying powders like blood meal.
- Monitor Plant Response: Pay close attention to how your plants react after application. Signs of nitrogen overdose include yellowing or burning at the leaf tips, while inadequate nitrogen can result in stunted growth and yellowing leaves. If you notice any of these signs, adjust your fertilizer application frequency or strength accordingly.
- Watering After Application: After applying fertilizers like compost tea or manure tea, always water your plants well. This helps the nutrients move into the soil, ensuring that they are accessible to plant roots. It also helps reduce the risk of fertilizer “burn” caused by concentrated fertilizer sitting on the soil surface.
Mastering Fertilizer Application for Maximum Plant Health
Getting the application techniques right is key to making the most of your homemade fertilizers. Whether you choose soil drenching or foliar feeding, make sure to apply at the right times, use the right amount, and follow safety practices to protect both your plants and the environment.
By doing so, you’ll create a thriving garden full of healthy, nutrient-rich plants that benefit both you and the planet.
Do you have any tips or questions about applying homemade fertilizers? Let me know in the comments—I’d love to hear your experiences!
The Real Risks of DIY Nitrogen Fertilizers—and How to Handle Them Like a Pro
Let’s face it—DIY nitrogen fertilizers sound like the holy grail of organic gardening. They’re cheap, natural, and can supercharge plant growth. But here’s the deal: if you’re not careful, they can backfire big time.
I’ve seen overzealous gardeners burn their plants, throw off soil chemistry, or worse—introduce harmful pathogens into their gardens. So before you go all-in with compost teas and manure mixes, let’s talk risks. And more importantly, how to dodge them like a seasoned pro.
Can You Really Overdo It With Nitrogen?
Absolutely—and it’s more common than most folks think. Over-fertilization can lead to “nitrogen burn,” where leaves turn yellow at the tips, curl, or even get scorched. It’s not just ugly—it can stunt growth or kill young plants altogether.
Too much nitrogen also pushes plants to grow fast and lush… but at the cost of fruit and flower production. You’ll end up with big, leafy greens and zero tomatoes—trust me, I’ve been there.
How to fix it?
- Test your soil first. Always. A basic NPK soil test from your local extension office or garden center can save you a ton of guesswork.
- Go slow. Use weaker concentrations and build up only if your plants are showing signs of deficiency.
- Know your crop. Leafy greens love more nitrogen; fruiting crops like peppers and tomatoes? Not so much.
Expert Tip: According to a 2024 University of California Cooperative Extension bulletin, exceeding 50 ppm nitrate-N in soil tests can lead to excessive vegetative growth and delayed fruiting.
Are Animal Manures and Teas Safe?
Yes—and no. Raw manures (especially from cows, chickens, or pigs) can be teeming with pathogens like E. coli and Salmonella. Even if you’re making manure tea, the brewing process doesn’t always kill the bad stuff. Using it on edible crops? Now you’ve got a potential food safety issue on your hands.
So, how do you play it safe?
- Compost it fully. Make sure the manure hits at least 130°F (55°C) for three consecutive days in a hot compost pile.
- Age it right. Let raw manures sit for at least 90–120 days before applying them to soil used for food crops.
- Avoid foliar sprays. Never spray manure teas directly on leaves or fruit, especially close to harvest time.
Backed by Science: A 2023 USDA study confirms that poorly composted manures remain one of the leading sources of E. coli contamination in small-scale organic farms.
Can Homemade Fertilizers Mess With Soil pH?
Oh, you bet. Adding high-nitrogen inputs like blood meal, urine, or even coffee grounds in bulk can gradually acidify your soil. And if you’re using wood ash or lime to “balance” it without testing? You might swing the pH too far in the other direction.
When soil pH shifts out of balance, nutrients get locked up—so even if they’re present, your plants can’t absorb them. It’s like putting a gourmet meal in front of someone who can’t use a fork.
Here’s what I recommend:
- Run a pH test once a season. Keep your soil between 6.0–7.0 for most crops.
- Balance amendments. For every high-nitrogen input, use a buffering organic material like finished compost or biochar.
- Rotate wisely. Some crops—like beans and peas—naturally help restore balance by fixing nitrogen in the soil.
Pro Insight: The NRCS Soil Health Guide (2024) highlights the importance of maintaining neutral pH levels to ensure microbial activity and nutrient uptake remain stable across all growing seasons.
A Quick Note on Environmental Impact: Let’s Not Poison Our Watersheds
This is a biggie most folks skip over. When you apply too much nitrogen—or apply it right before a rain—you’re setting the stage for runoff. That excess nitrogen can leach into waterways, fueling algal blooms and harming aquatic ecosystems. It’s not just a farm problem—it happens in home gardens, too.
To avoid that mess:
- Never apply before heavy rain. It’s a waste and a pollution risk.
- Keep a buffer. Avoid fertilizing within 10–20 feet of storm drains, ditches, or ponds.
- Mulch and cover. Use mulch or cover crops to help hold nutrients in place and reduce runoff.
EPA Alert: The EPA’s 2024 Nutrient Pollution Report warns that excess nitrogen runoff from residential landscapes contributes significantly to dead zones in U.S. coastal waters.
Mastering the Art of Organic Fertilization
There’s no magic formula when it comes to DIY nitrogen sources. But with a little know-how, a decent soil test, and some patience, you can absolutely use homemade fertilizers without risking your garden—or your health.
Just remember: more isn’t always better. Nature thrives on balance, and your soil is no exception.
Have questions about your homemade compost tea? Or not sure if your pH is out of whack? Drop your thoughts below—I’d love to hear how your garden’s growing and help out if I can.
Frequently Asked Questions (FAQs)
What’s the fastest way to add nitrogen to soil?
If your plants are screaming for nitrogen (hello, yellow leaves!), go with something fast-acting like urine diluted 1:10, fish emulsion, or compost tea made from fresh grass clippings. These soak into the soil quickly and give your plants a nitrogen boost within days. Just remember—not too much, or you’ll burn the roots!
Are coffee grounds really a good source of nitrogen?
Yes, but with a twist. Used coffee grounds are a slow-release nitrogen source. They’re great when mixed into compost or added to soil as a mulch layer, but they won’t fix a deficiency overnight. Think of them as the “slow and steady” contributor to long-term soil health.
Can I make nitrogen fertilizer from kitchen scraps?
Definitely. If you’re composting veggie peels, fruit scraps, and used tea bags—you’re already halfway there. Just be sure to balance “greens” (high in nitrogen) with “browns” (like dry leaves or cardboard). That’s the magic formula for a nutrient-rich compost that feeds your plants naturally.
How do I know if my plants need more nitrogen?
Classic signs? Pale green or yellow leaves, especially on the lower parts of the plant. If your plants look “leggy” or have stunted growth, it’s likely they’re short on nitrogen. I always suggest doing a quick soil test before adding anything. It’s like checking the thermometer before baking—it saves you from guessing.
Is blood meal better than compost for nitrogen?
Blood meal delivers a quick nitrogen punch—great for leafy greens or when your garden’s lagging. But it can be too strong if overused. Compost, on the other hand, builds soil health slowly and brings in more balanced nutrients. Use blood meal sparingly and combine it with organic compost for best results.
Will homemade nitrogen fertilizers attract pests?
Some, like fish emulsion or manure teas, can attract critters if not properly diluted or buried into the soil. My tip? Apply them in the early morning or late evening, water them in, and cover exposed compost with mulch. Problem solved!
How often should I apply homemade nitrogen fertilizer?
That depends on what you’re growing. Leafy greens like spinach or lettuce are heavy nitrogen feeders—they love a weekly dose of compost tea or diluted urine. For most veggies, every 2–3 weeks is just right. But always watch your plants. They’ll tell you what they need if you’re paying attention.
Are DIY nitrogen fertilizers safe for edible plants?
Absolutely—if made and applied correctly. Avoid overdoing it with strong stuff like urine, blood meal, or animal manure. Let compost fully break down before applying, and always wash produce before eating. When in doubt, test it on a small patch first.
Can I use grass clippings as fertilizer?
Yes! Fresh grass clippings are loaded with nitrogen. Use them as mulch around your plants, or steep them in water for 3–5 days to make grass tea—a natural nitrogen liquid fertilizer. Just don’t pile them too thick, or they’ll turn into a slimy mess.
What’s the best homemade nitrogen fertilizer for beginners?
Start with compost tea or diluted urine (yep, it works!). They’re simple, safe, and super effective. You can also try banana peel compost or aquarium water if you have pets. These methods give great results without needing special tools or complicated steps.
Wrap-Up: Let’s Grow Smarter with Homemade Nitrogen Fertilizers
Here’s the bottom line: you don’t need to spend a fortune or rely on synthetic chemicals to keep your garden thriving. With the right mix of creativity, observation, and science-backed practices, you can whip up powerful, homemade nitrogen fertilizers that rival store-bought options—without the environmental baggage.
I’ve tried these DIY methods myself—everything from compost tea to fish emulsion—and I’ve seen firsthand how they boost plant health, enrich the soil, and support long-term sustainability. The best part? You’re not just feeding plants; you’re building a self-sustaining system that improves year after year.
And yes, it takes a little experimentation. Not every garden is the same, and your plants might respond better to blood meal or grass clippings depending on the crop and soil type. That’s why I always encourage fellow growers to observe, tweak, and trust their instincts. Notice yellowing leaves? That might point to a nitrogen deficiency. Try adjusting your mix and track the results.
This journey into DIY nitrogen solutions isn’t just about plant food—it’s about empowerment. You’re learning to read your soil, understand your crops, and make informed decisions that lead to real, visible growth. That’s experience money can’t buy.
But let’s not stop here.
If you’ve tested any of these methods or have a nitrogen-rich trick up your sleeve, I’d love to hear about it! What’s worked in your garden? What hasn’t? Drop a comment below or reach out—I’m always here to swap tips, troubleshoot, or just geek out over healthy compost.
Want more insights?
Stick around—I’ve got more expert tips coming on balancing soil nutrients, tackling pest issues naturally, and improving yield without compromising soil health. Subscribe or bookmark the blog so you don’t miss out!
Over to you: What’s your go-to homemade fertilizer? Got questions or need help decoding your soil’s signals? Let’s chat in the comments!
