Growing pawpaw trees from seeds is an exciting and fulfilling gardening project. If you’ve ever wanted to enjoy the creamy, custard-like fruit of the pawpaw tree in your backyard, now is the perfect time to start. In this in-depth guide, we’ll cover everything from selecting seeds to nurturing your young trees, with tips that will help you every step of the way. Whether you’re a beginner gardener or a seasoned pro, this detailed guide will ensure your success.
What Is a Pawpaw Tree and Why Should You Grow It?
The pawpaw tree (Asimina triloba) is a member of the Annonaceae family, producing a tropical fruit that is rarely found in stores due to its short shelf life. The fruit is delicious, with a flavor profile reminiscent of a mix of banana, mango, and melon. The pawpaw tree thrives in temperate climates and is native to North America, growing well in USDA zones 5-9.
Why Grow Pawpaw Trees?
- Unique Flavor: Pawpaw fruits are a delicacy that can’t be replicated by any other fruit. If you enjoy tropical flavors but live in a temperate region, the pawpaw tree is an ideal choice.
- Hardy Tree: Despite its exotic look, the pawpaw tree is quite hardy, tolerating a variety of soil types and growing conditions.
- Nutritional Benefits: Pawpaw fruits are packed with vitamins A, C, and several B vitamins. They are also a good source of fiber, making them an excellent addition to your diet.
- Environmental Impact: Pawpaw trees are native, meaning they support local wildlife, including pollinators like bees and butterflies.
By growing pawpaw trees from seed, you’re not just adding a unique fruit tree to your garden; you’re also contributing to the local ecosystem and promoting biodiversity.
Step 1: How to Source Pawpaw Seeds
Before you start planting, you need to source high-quality pawpaw seeds. You have two options: harvest seeds from fresh fruits or buy them from a reliable supplier.
Harvesting Seeds from Fresh Pawpaw Fruits
If you have access to pawpaw fruits, you can harvest the seeds directly. The seeds from ripe, fresh pawpaw fruits are your best bet since they have the highest germination potential. Follow these steps to ensure you collect viable seeds:
- Pick a ripe fruit: Wait until the fruit is fully ripe. It should feel soft to the touch and give off a distinct fruity smell.
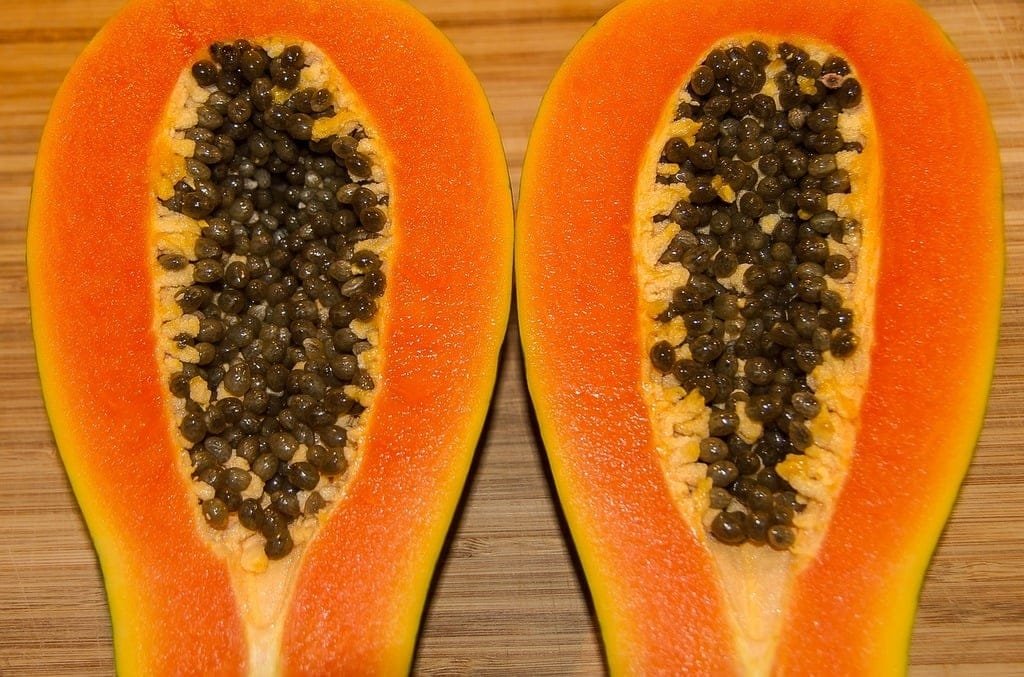
- Extract the seeds: Cut the fruit open and scoop out the seeds. You will find large, dark seeds surrounded by soft, yellow flesh.
- Clean the seeds: Gently rinse the seeds with cool water to remove all the pulp. Any remaining pulp can attract mold, so thorough cleaning is crucial.
- Dry the seeds: Lay the seeds on a paper towel to dry for a day or two before storing or preparing for stratification.
Purchasing Seeds from a Supplier
If fresh pawpaw fruits are not available, you can purchase seeds from online nurseries or specialty seed stores. When buying seeds, ensure that they are fresh and that the seller has properly stored them to maintain their viability. Some sellers may even offer pre-stratified seeds, saving you time in the cold storage process.
Step 2: Understanding Seed Stratification
Stratification is a process that simulates winter conditions for seeds, triggering the biochemical changes necessary for germination. Pawpaw seeds require a cold stratification period, typically lasting around 70-100 days, before they can sprout. This process is non-negotiable if you want to successfully grow pawpaw trees from seed.
Why Stratification Is Necessary
Without stratification, pawpaw seeds will remain dormant. In nature, pawpaw seeds are exposed to winter cold before germinating in spring. By mimicking this process, you can ensure your seeds break dormancy and begin the germination process at the right time.
How Stratification Helps
- Breaking Dormancy: Stratification helps the seed recognize when it’s time to sprout by mimicking seasonal temperature changes.
- Increasing Germination Rates: Seeds that undergo stratification are more likely to germinate successfully. Without it, only a fraction of seeds might sprout.
Step 3: Preparing Pawpaw Seeds for Stratification
Proper seed preparation is critical for the stratification process. Before you refrigerate your seeds, make sure you prepare them correctly.
- Cleaning the Seeds Thoroughly: Remove any pulp or fruit remnants, as they can rot during storage. Place the seeds in a colander or sieve and rinse them under cool water to ensure they’re free from any organic material.
- Choosing the Right Medium: To prevent the seeds from drying out, place them in a moist medium. Mix sand or sphagnum peat moss with a little water until it reaches a damp but not soggy consistency.
- Moisture Control: The medium you use should hold moisture but not be too wet. To test, squeeze a handful of the mixture—water should trickle out but not pool in your hand. Too much moisture can cause mold to form, while too little will dry out the seeds.
- Labeling: Write the date of sowing on a tag or label for easy reference, so you know when to expect your seeds to be ready for planting.
Step 4: How to Stratify Pawpaw Seeds
- Prepare a Plastic Bag or Container: After placing the seeds in the moist medium, seal them in a plastic bag or container to create a humid environment. Ensure there’s some air circulation, or the seeds may suffocate.
- Refrigeration: Store the seeds in your refrigerator at temperatures between 34–40°F (1–4°C). The colder temperatures mimic the winter season.
- Check for Mold and Moisture: Periodically (every 2–3 weeks), check the seeds to ensure the medium is still moist and there is no mold buildup. If you notice mold, remove the affected seeds, clean the medium, and replace it if necessary.
- Stratification Duration: Aim for 70–100 days of stratification. Pawpaw seeds require this cold treatment to break dormancy and trigger germination.
Step 5: Preparing Soil for Pawpaw Seeds
Once the stratification period is over, the seeds will be ready to plant. The next step is preparing a suitable soil environment for successful germination and growth.
Choosing the Right Soil Type
Pawpaw trees thrive in well-draining, fertile, loamy soil. If your garden has clay or sandy soil, amend it with organic matter like compost or well-rotted manure to improve texture and fertility. The soil should also retain moisture without becoming soggy.
Adjusting Soil pH
Pawpaw trees prefer slightly acidic to neutral soil with a pH of 5.5 to 7. You can test your soil’s pH using a soil testing kit, which is available at most garden centers. If your soil is too acidic, add lime to raise the pH; if it’s too alkaline, use sulfur to lower it.
Ensuring Proper Drainage
While pawpaw trees are tolerant of a variety of soil conditions, they require well-drained soil. If the soil doesn’t drain well, your seeds might rot. Mix perlite into your soil to enhance drainage if needed.
Step 6: Planting Pawpaw Seeds
Once your seeds have been stratified and you’ve prepared the soil, it’s time to plant your pawpaw seeds. Planting pawpaw seeds requires a bit of patience, as the germination process can be slow, but with the right care, your seeds will take root and grow into strong saplings.
Best Time to Plant
The ideal time to plant pawpaw seeds is in the spring, after the last frost. This allows your seeds to take advantage of the warmer weather and start growing when the temperatures rise. If you’re planting seeds outdoors, ensure that the danger of frost has passed. You can also start seeds indoors earlier and transplant them outside once they’ve sprouted and the weather is favorable.
How to Plant the Seeds
- Prepare a Hole: Dig a hole that’s about 2–3 inches deep for each seed. The hole should be deep enough to accommodate the seed without crowding it.
- Place the Seed: Gently place the seed in the hole with the pointed end facing down. Pawpaw seeds are large and oval-shaped, so positioning them correctly helps the root develop properly.
- Cover the Seed: Cover the seed with soil, pressing it down gently to ensure there are no air pockets around it.
- Watering: After planting, water the soil lightly to help settle the seed and ensure that the surrounding soil is moist. Make sure the soil is consistently damp, but not soggy.
Indoor Planting for Faster Germination
If you’re starting pawpaw seeds indoors, use seed trays or small pots filled with a well-draining potting mix. Follow the same steps for planting as you would outdoors, but keep the seeds in a warm, sunny location. Place them in an area where the temperature remains between 65–75°F (18–24°C). Keep the soil moist but not waterlogged, and ensure the seeds get plenty of indirect sunlight.
Step 7: Caring for Pawpaw Seedlings
Once your seeds have germinated and the seedlings start to grow, providing the right care is crucial for healthy development. Pawpaw trees are relatively low-maintenance but require attention to detail to thrive.
Watering
Pawpaw seedlings need regular watering to keep the soil evenly moist. However, it’s essential to avoid overwatering, as this can lead to root rot. Ensure the soil has proper drainage, and water the seedlings thoroughly but allow excess water to drain away. During hot and dry periods, check the soil more frequently to maintain consistent moisture levels.
Fertilizing
Pawpaw trees benefit from regular fertilization during their growing season. Use a balanced fertilizer with an NPK (Nitrogen, Phosphorus, Potassium) ratio of 10-10-10 or 20-20-20. Apply the fertilizer in early spring, when the tree begins to show signs of new growth, and again in mid-summer. Alternatively, you can use organic compost to enrich the soil, which is a more natural option.
Mulching
Mulch around the base of your pawpaw tree to conserve moisture, keep weeds in check, and protect the roots from extreme temperatures. Use organic materials like wood chips, straw, or leaves. Apply a layer about 2–3 inches thick, ensuring it doesn’t touch the trunk of the tree directly.
Step 8: Transplanting Pawpaw Seedlings
After a year or two, your pawpaw seedlings will be ready to transplant outdoors. Transplanting ensures that your trees have plenty of space to grow and develop into full-sized trees. However, it’s crucial to choose the right time and location for this process.
When to Transplant
The best time to transplant pawpaw trees is in early spring, after the last frost. This gives the seedlings enough time to establish themselves in their new location before the heat of summer sets in. If transplanting in the fall, ensure the tree has several months to settle into its new environment before the cold winter months.
Selecting a Planting Location
Pawpaw trees need a location with partial to full shade, especially in their early years. While they can tolerate full sun once mature, they grow best in areas with dappled sunlight or light shade. Look for a spot that’s sheltered from strong winds and has well-drained, fertile soil.
How to Transplant
- Prepare the Site: Before transplanting, prepare the site by digging a hole that’s twice the size of the tree’s root ball. Loosen the soil around the hole to encourage root growth.
- Remove the Seedling Carefully: Gently lift the seedling from its current container or location, being cautious not to damage the roots. If the tree has a large root system, gently tease the roots apart.
- Place the Seedling in the Hole: Position the seedling in the hole so that the top of the root ball is level with the surrounding soil. Avoid planting the tree too deep, as this can cause it to suffocate.
- Fill the Hole and Water: Backfill the hole with soil, gently pressing it down to remove air pockets. Water the transplanted tree thoroughly to settle the soil around the roots.
Step 9: Ongoing Maintenance and Pruning
As your pawpaw tree matures, it will require ongoing care to maintain its health and productivity. Proper pruning and maintenance are key to ensuring that the tree grows strong and produces abundant fruit.
Pruning Pawpaw Trees
Pruning pawpaw trees is important to remove dead or damaged branches and shape the tree for better airflow and sunlight penetration. Follow these guidelines for effective pruning:
- When to Prune: The best time to prune pawpaw trees is during the dormant season in late winter or early spring, before the tree starts to bud.
- Pruning Techniques: Cut back any dead or diseased wood. If the tree is crowded with branches, selectively thin out growth to improve light and air circulation. Avoid cutting too much at once to prevent stressing the tree.
Monitoring for Pests and Diseases
Pawpaw trees are relatively pest-resistant but can be susceptible to a few issues, such as aphids, pawpaw weevils, and fungal diseases. Regularly inspect your tree for signs of pests or diseases, and address any issues promptly. Organic insecticides or neem oil can help control pests without harming beneficial insects.
Step 10: Harvesting and Enjoying Your Pawpaw Fruit
After several years of care, your pawpaw tree will begin to bear fruit. Harvesting pawpaw fruits requires patience, as they don’t ripen until they are fully mature. Here’s how to know when to harvest and how to enjoy your pawpaw fruits.
When to Harvest
Pawpaw fruits are ready to harvest when they begin to soften and change color from green to yellow or brown. This usually happens in late summer or early fall. Gently press the fruit with your fingers—if it yields slightly, it’s ready to be picked.
How to Harvest
To harvest, gently twist the fruit from the tree or use pruning shears to cut the stem close to the fruit. Handle the fruit with care to avoid bruising it. Pawpaw fruits do not ripen once picked, so be sure to harvest them at the right time.
Enjoying Pawpaw Fruits
Once harvested, pawpaw fruits can be eaten fresh or used in recipes. The flesh can be scooped out and eaten raw, or blended into smoothies, pies, or cakes. The flavor is creamy and sweet, making it a perfect treat for those who appreciate exotic fruits.
Frequently Asked Questions
1. How Long Does It Take for Pawpaw Trees to Fruit?
Pawpaw trees typically start bearing fruit between 4 to 7 years after planting, depending on growing conditions. Trees grown from seeds may take longer than those propagated from grafts, but with patience, you can enjoy fruit from your tree in a few years.
2. Can Pawpaw Trees Grow Indoors?
Pawpaw trees are best suited for outdoor growth, especially because they require cold stratification for seed germination and have specific sunlight needs. Growing them indoors can be challenging, as they need a period of dormancy in the winter and plenty of space for their roots to spread.
3. Can You Grow Pawpaw Trees in Containers?
While pawpaw trees can be grown in containers when young, they are best suited for planting in the ground once mature. The roots of pawpaw trees are deep and wide-spreading, making container growth challenging for long-term success. If growing in a container, choose a large, deep pot and ensure excellent drainage.
4. What Type of Soil Do Pawpaw Trees Prefer?
Pawpaw trees prefer well-drained, fertile soil with a slightly acidic to neutral pH. They thrive in soil that is rich in organic matter. If your soil is heavy or clay-like, improve drainage by adding compost or organic matter.
5. Can Pawpaw Trees Tolerate Cold Weather?
Pawpaw trees are hardy in USDA zones 5–9, meaning they can tolerate cold temperatures down to about -20°F (-29°C). However, late spring frosts can damage the flowers or young fruit, so it’s important to choose a planting location that is not prone to late frost.
6. How Can I Prune My Pawpaw Tree for Better Fruit Production?
Prune your pawpaw tree in late winter or early spring before new growth starts. Remove dead or diseased wood, and thin out crowded branches to improve airflow and light penetration. Proper pruning helps ensure the tree’s energy is directed towards fruit production.
7. Are Pawpaw Trees Self-Pollinating?
Pawpaw trees are not fully self-pollinating, though they can produce some fruit without a second tree. To maximize fruit yield, plant two or more trees to encourage cross-pollination. Pawpaw trees rely on flies and beetles for pollination, so be sure to plant them in areas where these insects are abundant.
Conclusion and Final Tips
Caring for a mature pawpaw tree can be a rewarding experience, especially when you eventually harvest its delicious fruits. By following the proper steps for watering, mulching, fertilizing, and protecting against pests and diseases, you’ll ensure your tree stays healthy for many years. Avoid common mistakes like overwatering and skipping stratification, and watch your pawpaw tree grow into a flourishing plant.
Quick Recap of Key Steps
- Water regularly, ensuring consistent moisture without overwatering.
- Fertilize with organic options in early spring and mid-summer.
- Mulch around the tree to retain moisture and suppress weeds.
- Prune in late winter/early spring for healthy growth.
- Protect your tree from pests and diseases using organic solutions.
If you’ve been thinking about growing pawpaw trees, don’t hesitate to start! These trees can thrive in the right conditions, offering delicious fruit and a unique addition to your garden. With patience and care, your pawpaw trees will reward you with a bounty of nutritious, flavorful fruits for years to come.
Happy gardening!


