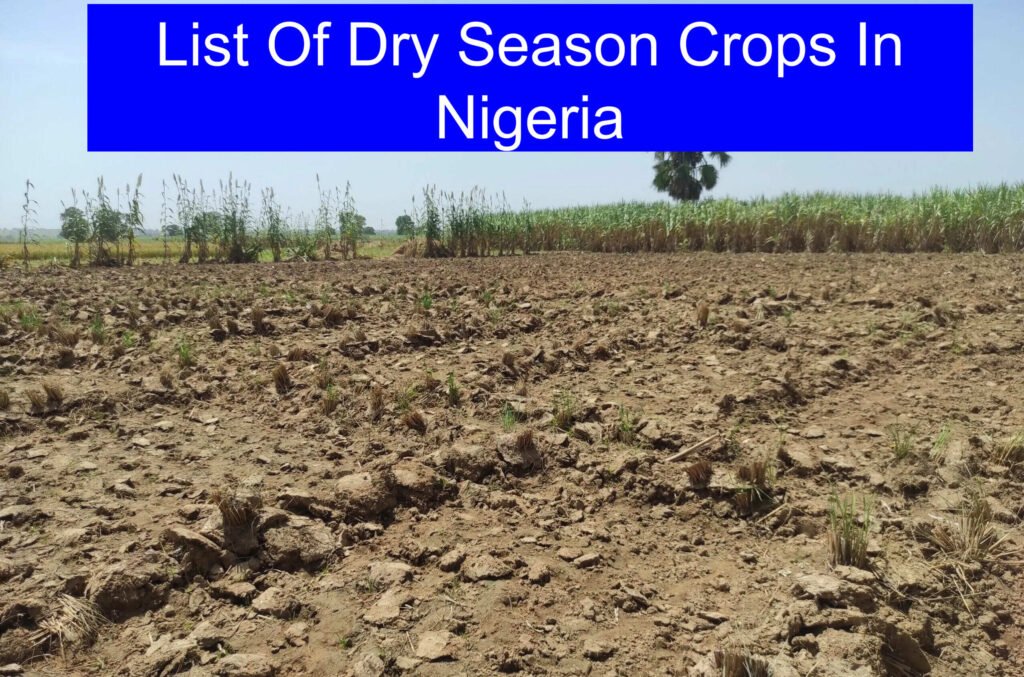
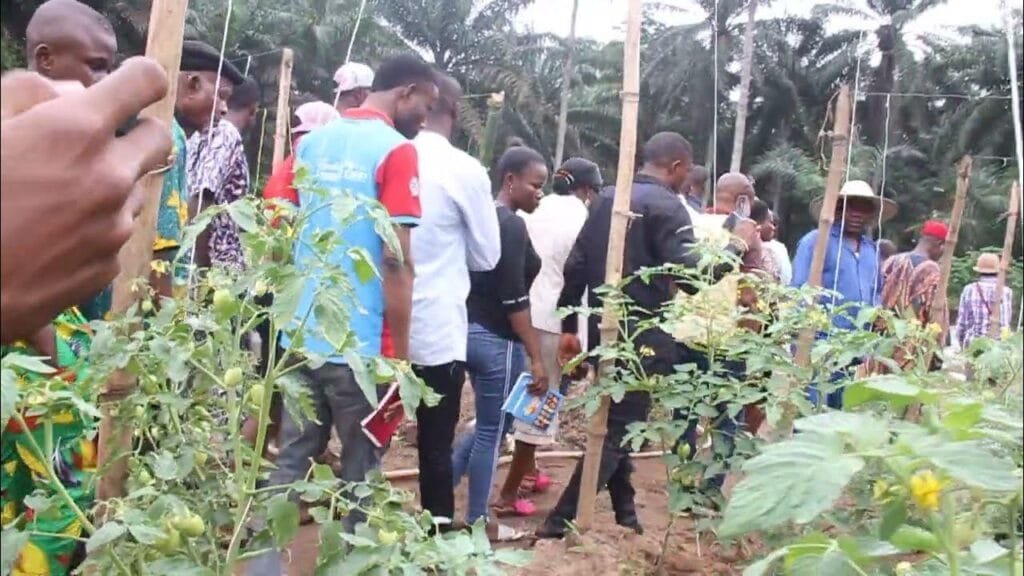
List Of Dry Season Crops In Nigeria: Let’s face it—farming in Nigeria, especially during the dry season, can be tricky. The lack of rainfall and the harsh sun can throw off even the most seasoned farmer. But here’s the good news: you can thrive with the right crops and proper techniques even when the rains are scarce. In this guide, we’ll explore some of the best dry-season crops to grow in Nigeria, and I’ll walk you through the steps to grow them successfully, no matter if you’re a beginner or looking to improve your harvest.
So, why does it matter? Understanding which crops to plant during the dry season could make the difference between a profitable season and a frustrating one. And I’m here to ensure you make the right choices!
1. Tomatoes: The Goldmine of the Dry Season
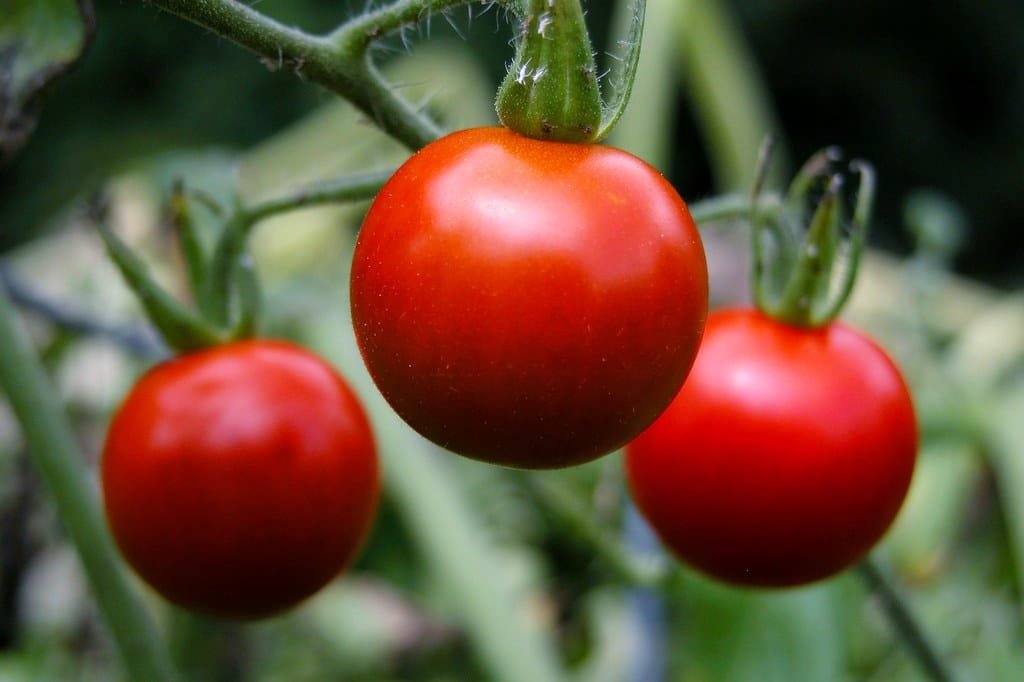
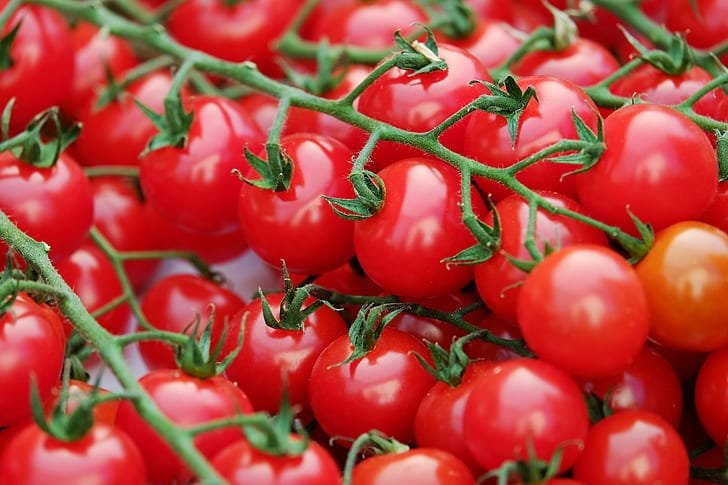
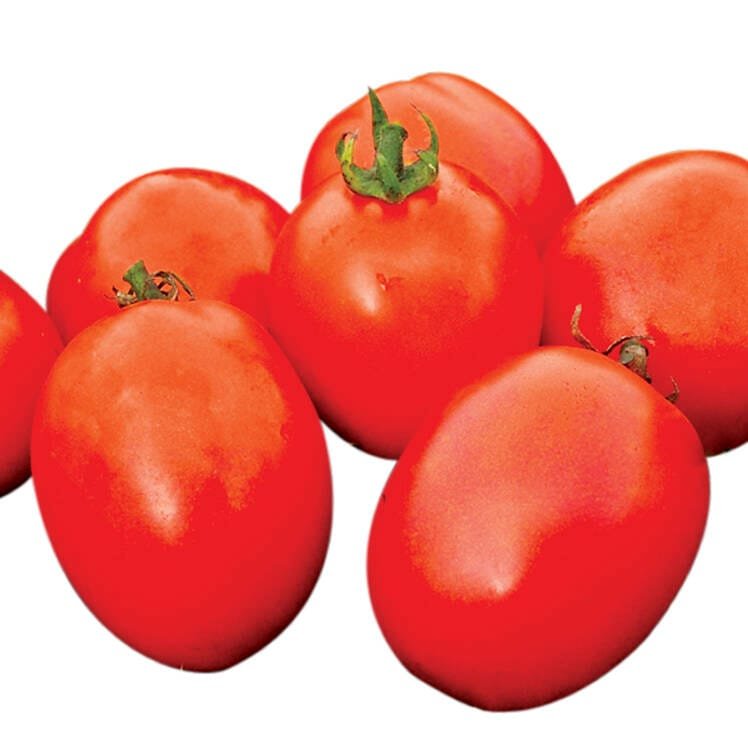
Tomatoes are like the crown jewel of dry-season farming in Nigeria. They’re in high demand, and they do well during the dry months when water is carefully managed through irrigation.
Best Time to Plant Tomatoes
The best time to plant tomatoes in Nigeria is at the start of the dry season, usually around November to December, right when the harmattan is setting in. This is when temperatures drop slightly, making it easier for the plants to thrive.
How to Grow Tomatoes
Step 1: Choose the Right Variety
There are several tomato varieties, but for the dry season, look for varieties like Roma (for paste) or UC-82B (resistant to diseases). These are well-suited for irrigation farming.
Step 2: Prepare Your Soil
Tomatoes love well-drained, fertile soil. Before planting, enrich the soil with compost or organic matter. A pH level of 6.0 to 6.8 is ideal.
Step 3: Planting the Seeds or Seedlings
Tomatoes can be grown from seeds, but many farmers prefer using seedlings. Space them about 24-36 inches apart to ensure they have enough room to spread.
Step 4: Watering & Irrigation
During the dry season, tomatoes need consistent watering. Drip irrigation works wonders here, as it delivers water directly to the roots, minimizing evaporation. Avoid overhead watering, as it can lead to fungal diseases.
Step 5: Pest Control
Watch out for pests like aphids and whiteflies. Neem oil or insecticidal soap can help keep them in check.
Step 6: Harvesting
Tomatoes are ready to harvest about 70-90 days after planting. Pick them when they’re fully ripe, but firm to the touch.
2. Pepper: Spice Up Your Dry Season Farming
Pepper is another crop that thrives in Nigeria’s dry season. The heat doesn’t faze it as long as it gets enough water. With varieties like Chili and Bell Pepper, you can turn a small plot into a lucrative farm.
Best Time to Plant Pepper
The dry season is perfect for pepper, and you should plant it from November to December when temperatures start to stabilize.
How to Grow Pepper
Step 1: Choose the Right Variety
Chili peppers, like Habanero and Scotch Bonnet, are extremely popular in Nigeria and grow well in the dry season. If you’re after something milder, go for Bell Pepper.
Step 2: Prepare the Soil
Pepper thrives in well-drained, loamy soil. It also needs a slightly acidic pH (5.5 to 6.5). Add organic compost to the soil to improve fertility.
Step 3: Planting
Space the seedlings 12-18 inches apart. You can grow pepper from seeds, but using seedlings will speed up the process. Dig holes, drop in the seedlings, and cover the roots with soil.
Step 4: Watering
Just like tomatoes, peppers need consistent moisture. Drip irrigation is best, but you can also use furrow irrigation if it’s available.
Step 5: Pest Control
Pepper is prone to pests such as aphids and caterpillars. A simple mixture of soap and water or neem oil spray can keep these pests at bay.
Step 6: Harvesting
Pepper plants will bear fruit in about 3-4 months. Harvest peppers when they reach their full size and color. Don’t wait too long to avoid over-ripening!
3. Onions: Staple and Profitable
Onions are not just delicious but also a fantastic crop to grow during the dry season. With proper irrigation, onions can thrive in the harmattan months.
Best Time to Plant Onions
Onions do well in cooler dry-season temperatures, so plant them between November and January for optimal growth.
How to Grow Onions
Step 1: Choose the Right Variety
For the dry season, go for varieties like Red Creole or Texas Early onions, which are well-suited for irrigation farming.
Step 2: Soil Preparation
Onions love loose, well-drained soil. You should prepare raised beds for better drainage. Enrich the soil with organic matter like compost.
Step 3: Planting
Onion bulbs are generally planted 1 to 2 inches deep. Space them about 4 inches apart in rows, allowing them plenty of room to grow.
Step 4: Watering
Onions are sensitive to water stress, so keep them well-watered, especially during the dry season. Drip irrigation ensures the water reaches the roots without wasting any.
Step 5: Pest Control
Onions are prone to fungal diseases and pests like onion maggots. Use organic fungicides and insecticidal soap as needed.
Step 6: Harvesting
Onions are ready to harvest when the leaves start turning yellow. Pull them up carefully and let them dry for a few days before storing.
4. Watermelon: Cool, Refreshing, and Profitable
Watermelon is perfect for dry-season farming, especially with its high water content. A lot of Nigerian farmers use irrigation to grow this crop, and the rewards are sweet—literally!
Best Time to Plant Watermelon
Plant watermelon at the beginning of the dry season, between November and December. The plants will thrive in the warm temperatures, and your harvest will be ready before the rains start.
How to Grow Watermelon
Step 1: Choose the Right Variety
Varieties like Crimson Sweet and Seedless Watermelon are popular for dry-season farming in Nigeria. They’re juicy, sweet, and yield high returns.
Step 2: Soil Preparation
Watermelons like sandy loam soil. Mix in compost to improve the soil’s nutrient content and ensure good drainage.
Step 3: Planting
Space watermelon seeds about 3 feet apart. They’ll grow into large vines, so give them plenty of space to spread.
Step 4: Watering
Watermelons need a lot of water to grow. A consistent drip irrigation system will ensure the soil stays moist but not waterlogged.
Step 5: Pest Control
Watch for pests like aphids and beetles. Natural insecticides or neem oil can help keep these critters at bay.
Step 6: Harvesting
Watermelons are ready to harvest when they produce a hollow sound when tapped. Depending on the variety, this can take about 75 to 90 days.
5. Cucumber: Refreshing and Profitable in the Dry Season
Cucumber is another refreshing crop that flourishes during the dry season, especially with the help of irrigation. Its high water content and crisp texture make it a popular choice for local markets. Plus, cucumbers are easy to grow and can be harvested within a short period.
Best Time to Plant Cucumbers
Cucumbers love the dry season because the heat helps them thrive. Plant them from late November through December, right at the start of the dry season. This ensures you can harvest them before the temperatures climb too high.
How to Grow Cucumbers
Step 1: Select the Right Variety
The most common varieties for dry-season farming are Marketmore and Poinsett 76. Both varieties have a good resistance to diseases and produce high yields, making them ideal for farmers.
Step 2: Prepare Your Soil
Cucumbers prefer well-drained, loose soil that’s rich in organic matter. Add compost to your soil to improve its texture and fertility. A pH level of 6.0 to 7.0 is perfect for cucumber growth.
Step 3: Planting
Plant cucumber seeds about 1 inch deep in rows. Space them about 36 inches apart to allow their vines to grow freely. If you’re planting seedlings, ensure they’re spaced similarly to allow enough room for the vines to spread out.
Step 4: Irrigation
Cucumbers need plenty of water to stay hydrated. Use a drip irrigation system to provide consistent moisture directly to the roots. Be careful not to overwater, as this can lead to root rot. Keep the soil moist but not soggy.
Step 5: Pest Control
Cucumbers are susceptible to pests like aphids, whiteflies, and cucumber beetles. You can use natural insecticides, such as neem oil or garlic sprays, to keep them under control. Additionally, mulching around the plants can help prevent pests.
Step 6: Harvesting
Cucumbers grow quickly and are ready to harvest within 50 to 70 days. Harvest them when they are firm, green, and about 6 to 8 inches long. Pick them regularly to encourage new fruit production.
6. Spinach: A Nutrient-Rich Crop Perfect for Dry Season Farming
Spinach is a fast-growing leafy green that can be cultivated successfully during the dry season, provided it gets consistent moisture through irrigation. Not only is spinach nutritious and in high demand, but it’s also easy to grow, making it a great choice for beginner farmers.
Best Time to Plant Spinach
Spinach does well when planted at the beginning of the dry season. Plant it in late November or December when temperatures are cooler, but the weather is still dry.
How to Grow Spinach
Step 1: Choose the Right Variety
Varieties like Savoy and Flat-leaf spinach are ideal for dry season farming. Savoy spinach has curly leaves and is more resistant to pests, while Flat-leaf spinach has smoother leaves and is quicker to grow.
Step 2: Soil Preparation
Spinach thrives in fertile, well-drained soil. Enrich the soil with compost or organic fertilizers to boost its nutrient content. A slightly acidic pH of 6.0 to 7.0 is perfect for spinach.
Step 3: Planting
Plant spinach seeds about ½ inch deep in rows spaced 12 to 18 inches apart. If you’re planting seedlings, space them at least 6 inches apart to give them room to grow.
Step 4: Irrigation
Spinach needs consistent moisture. Use drip irrigation to keep the soil evenly moist. If you’re using sprinklers, water early in the morning to reduce the risk of fungal diseases.
Step 5: Pest Control
Spinach is prone to pests like aphids and caterpillars. A natural insecticidal soap or neem oil can help control these pests without harming your crop.
Step 6: Harvesting
Spinach matures quickly and is ready to harvest about 30 to 45 days after planting. Harvest the outer leaves first, allowing the inner leaves to continue growing. This helps extend the harvest period.
7. Cabbage: A Reliable Crop for the Dry Season
Cabbage is a sturdy crop that grows well during the dry season, especially when irrigated properly. It’s a staple vegetable in Nigerian kitchens, and its high demand makes it a profitable crop for farmers looking to grow during the dry months.
Best Time to Plant Cabbage
Plant cabbage at the start of the dry season, around November to December. The cooler weather during the early dry season is perfect for cabbage growth, as they don’t tolerate extreme heat well.
How to Grow Cabbage
Step 1: Choose the Right Variety
Common varieties for dry-season farming include Green Cabbage and Red Cabbage. Both varieties are suited for the Nigerian climate, but Green Cabbage tends to do better in the dry season.
Step 2: Soil Preparation
Cabbages prefer rich, well-drained soil with a pH of 6.0 to 7.5. Add compost to improve soil fertility and structure. Ensure the soil is loose and free of weeds to promote healthy root growth.
Step 3: Planting
Cabbage seeds should be planted about ¼ inch deep in rows that are spaced about 18 inches apart. If using seedlings, plant them 12 to 18 inches apart.
Step 4: Irrigation
Cabbages need consistent watering to prevent the soil from drying out. A drip irrigation system works best for cabbage because it provides a steady flow of water without wetting the leaves.
Step 5: Pest Control
Cabbage is susceptible to pests like caterpillars and aphids. Use organic pesticides or hand-pick pests off your plants. Mulching can also help deter pests and conserve moisture.
Step 6: Harvesting
Cabbages are ready to harvest about 3 to 4 months after planting, depending on the variety. Harvest them when the heads are firm and fully formed. Be sure to cut the cabbage heads from the base of the plant.
8. Groundnut (Peanut): A Drought-Tolerant Crop
Groundnut, also known as peanut, is another excellent crop to grow during Nigeria’s dry season. Groundnuts are well-suited for the hot, dry conditions of the harmattan period, making them a staple choice for dry-season farming.
Best Time to Plant Groundnut
Groundnuts should be planted in the early dry season, typically from November to December. This allows the plants to establish their roots before the intense heat of the dry season sets in, ensuring they get the moisture they need through irrigation.
How to Grow Groundnut
Step 1: Choose the Right Variety
Popular varieties for dry season farming in Nigeria include Samnut 21, Samnut 23, and RMP 12. These varieties are well-suited to the local climate and have good resistance to common pests and diseases.
Step 2: Soil Preparation
Groundnuts prefer sandy loam soil with good drainage. Before planting, incorporate organic matter such as compost to improve soil fertility. The ideal pH for groundnuts is 6.0 to 7.0. Ensure the soil is loose and well-drained to allow the nuts to develop properly.
Step 3: Planting
Groundnuts are typically grown from seeds (the raw peanut kernels). Plant them about 2 to 3 inches deep and space the seeds 8 to 12 inches apart in rows. This will give the plants enough space to grow and spread their roots.
Step 4: Irrigation
Groundnuts require consistent moisture, especially during their flowering and pod development stages. While groundnuts are drought-tolerant, the dry season demands that you use an irrigation system, like drip irrigation, to ensure the plants get the water they need without excess moisture, which can lead to root rot.
Step 5: Pest Control
Watch out for pests like termites and aphids. You can control these pests by using natural insecticides or applying neem oil. Crop rotation can also help minimize pest build-up in the soil.
Step 6: Harvesting
Groundnuts are ready to harvest when the leaves start to yellow, and the plant shows signs of wilting. This typically happens around 90 to 120 days after planting. To harvest, gently uproot the plants, and carefully remove the peanuts from the roots.
9. Sweet Potatoes: Versatile and Hardy
Sweet potatoes are another great option for dry-season farming. They are hardy, drought-tolerant, and can be grown in a variety of soil types. Plus, they provide multiple harvests per year, making them a lucrative option for Nigerian farmers.
Best Time to Plant Sweet Potatoes
The ideal time to plant sweet potatoes is during the dry season, from December to January. Planting during this period allows the crops to mature in time for harvest before the rains begin.
How to Grow Sweet Potatoes
Step 1: Choose the Right Variety
There are various sweet potato varieties, but for dry-season farming, Covington and Bristol are popular choices. These varieties have good resistance to pests and produce high-quality yields.
Step 2: Soil Preparation
Sweet potatoes grow best in loose, well-drained soil. Before planting, loosen the soil to a depth of about 8-12 inches, adding compost to improve soil fertility. A slightly acidic pH (5.5 to 6.5) is ideal for optimal growth.
Step 3: Planting
Sweet potatoes are grown from vine cuttings or “slips.” Plant the slips in rows spaced about 12 to 18 inches apart. Ensure that the vines are planted deep enough to establish roots but not so deep that they rot. Sweet potatoes require a lot of space to spread out, so make sure they have plenty of room to grow.
Step 4: Watering
While sweet potatoes are drought-tolerant, they still need water, especially in the early stages. Watering through drip irrigation helps maintain consistent soil moisture without saturating the plants. Once the plants are established, they can tolerate the dry conditions better.
Step 5: Pest Control
Sweet potatoes are generally pest-resistant, but you should still keep an eye out for aphids and root-feeding nematodes. Use natural insecticides like neem oil if needed and practice crop rotation to reduce pest populations.
Step 6: Harvesting
Sweet potatoes are ready for harvest about 90 to 120 days after planting, depending on the variety. Harvest when the leaves begin to yellow, and the roots are mature. Carefully dig up the sweet potatoes, avoiding damage to the tubers.
10. Maize (Corn): A Classic Crop for the Dry Season
Maize is one of Nigeria’s most widely cultivated crops, and it’s a reliable option for dry-season farming, especially when you use proper irrigation methods. The Maize grows well in both the wet and dry seasons, but managing the water supply is crucial during the dry months.
Best Time to Plant Maize
Plant maize from November to December, right before the dry season’s peak heat. This gives the crop enough time to mature before the scorching sun kicks in.
How to Grow Maize
Step 1: Choose the Right Variety
Varieties like TZSR-Y, Oba Super, and SAMMAZ are excellent for the dry season because they are drought-resistant and can handle the heat of the dry months.
Step 2: Soil Preparation
Maize grows best in well-drained loamy soil. Enrich the soil with organic matter such as manure or compost to improve its fertility. Maize requires a pH of 5.5 to 7.0, so it’s a good idea to test your soil before planting.
Step 3: Planting
Plant maize seeds about 1.5 to 2 inches deep in rows, with about 8 to 12 inches of space between each seed. Space the rows at least 30 inches apart to allow the plants to grow without competing for space.
Step 4: Irrigation
Maize requires consistent moisture, particularly during germination and early growth stages. Use an irrigation system to maintain steady moisture levels, especially during the flowering stage. Avoid overwatering, as this can cause the roots to rot.
Step 5: Pest Control
Maize is susceptible to pests like the maize weevil, fall armyworm, and aphids. You can control these pests with organic insecticides, hand-picking, or using pheromone traps to reduce infestations.
Step 6: Harvesting
Maize is ready to harvest when the kernels are hard, and the husks turn brown. This typically happens around 90 to 120 days after planting. Harvesting early can result in poor-quality maize, so wait for full maturity before picking.
Irrigation Techniques for Dry-Season Farming: Keeping Your Crops Hydrated
When you’re farming in Nigeria during the dry season, one thing you’ll quickly learn is that water becomes your best friend. During the dry months, water isn’t as freely available as it is in the rainy season, so having the right irrigation system can make or break your crop yield. Let me walk you through some irrigation methods you should consider.
Drip Irrigation: Watering Right at the Roots
Drip irrigation is hands down one of the most efficient ways to water crops. Why? Because it delivers water directly to the roots of your plants, minimizing evaporation and runoff. It’s like giving your crops a drink, but only where they need it. For dry-season crops like tomatoes and peppers, drip irrigation ensures they get just the right amount of water to grow strong and healthy.
How to Set It Up:
- Install tubing: Lay down plastic tubing along your crop rows, making sure each plant has its emitter.
- Connect to water source: You can use a tank, river, or well as your water source. You’ll need a pressure regulator and filter to ensure the water flows smoothly and is clean.
- Timers and Controllers: Add a timer or automatic controller to schedule watering times—early morning or late evening works best.
Benefits: Less water is wasted, plants get a steady water supply, and you don’t have to constantly watch over the crops.
Sprinkler Irrigation: Broad Coverage for Larger Fields
Sprinkler irrigation is what you imagine when you think of a big field being watered from above. It’s great for larger fields where you need to cover a lot of ground quickly. However, it uses more water than drip irrigation, so it’s essential to time your watering wisely.
How to Set It Up:
- Install sprinklers: Set up a network of sprinkler heads that will cover your entire field. You can place them on tall stands or mount them on the ground, depending on the size of your field.
- Connect to a pump: Use a pump to push the water through the system, ensuring pressure is consistent across all the sprinklers.
- Water when needed: Set the system to water during the cooler parts of the day to avoid excessive evaporation.
Benefits: It covers large areas quickly, which is great for crops like maize that need watering over a wide space.
Flood Irrigation: An Old-School Method
Flood irrigation is not as common today, but in some cases, it can work well, especially for crops like rice. It involves flooding the field with water, allowing the crops to take up what they need. However, it’s water-intensive, so it’s better suited for areas with abundant water resources.
How to Set It Up:
- Prepare the field: Create channels or furrows around your field so water can flow evenly.
- Flood the area: Open your water sources and let the field fill up with water. Be sure to monitor it to avoid waterlogging, which can damage roots.
Benefits: It’s a straightforward approach, but requires careful management to avoid wasting water.
Soil Management for Dry-Season Farming: Keeping Your Soil Healthy and Productive
You can have the best irrigation system in the world, but if your soil isn’t healthy, your crops won’t thrive. Soil management is key to successful dry-season farming. Let’s talk about ways to keep your soil in top condition.
Composting: Natural Fertilizer Right at Your Doorstep
Composting is like giving your soil a superfood boost. When you add compost to your soil, you’re improving its structure, increasing its ability to retain moisture, and providing essential nutrients to your crops. If you’ve ever seen organic farmers at work, you know how much they swear by composting.
How to Start Composting:
- Gather Materials: Collect kitchen scraps like vegetable peels, coffee grounds, or yard waste like grass clippings and leaves.
- Pile It Up: Layer your compost materials—greens (nitrogen-rich) and browns (carbon-rich)—to help speed up decomposition.
- Aerate: Turn your compost regularly to help air circulate, which speeds up the process.
Benefits: Compost not only nourishes your crops but also improves the structure of your soil, helping it retain water better—essential for the dry season.
Mulching: Protecting Your Soil and Moisture
Mulching is like putting a blanket on your soil, keeping it cool and moist while also suppressing weeds. During the dry season, the ground can dry up quickly, but mulching prevents that by reducing evaporation and maintaining a steady moisture level.
How to Mulch:
- Gather Mulching Material: Use organic materials like straw, grass clippings, or even leaves.
- Spread It Evenly: Lay a thick layer (about 3-4 inches) around your plants, ensuring it covers the root zone.
- Maintain It: Keep the mulch layer fresh by adding more when it breaks down.
Benefits: It conserves water, keeps your soil temperature steady, and reduces weed competition.
Cover Cropping: Soil Insurance for the Future
Planting cover crops between your main crops is like giving your soil a vacation. These crops, often legumes like beans or groundnuts, are planted to improve soil fertility by fixing nitrogen. They also help with erosion control and can prevent weeds from taking over.
How to Use Cover Crops:
- Choose the Right Crops: Legumes (like cowpeas or soybeans) are perfect because they fix nitrogen in the soil.
- Plant in Between Seasons: You can plant them after harvesting your main crops to keep the soil covered and healthy until you’re ready to plant again.
- Till or Mulch the Crops: At the end of the season, till the cover crops into the soil or leave them as mulch.
Benefits: They naturally improve soil fertility and structure without needing synthetic fertilizers.
Weather Monitoring for Dry-Season Farming: Stay Ahead of the Game
Farming in the dry season means working with the weather, not against it. Staying informed about temperature fluctuations, rain (if any), and wind can help you make smart decisions for your crops.
Using Weather Apps and Local Forecasts
Technology can be your friend when it comes to weather tracking. There are several apps and websites where you can track local weather patterns in real-time. Websites like AccuWeather or Weather.com provide forecasts that are specifically tailored to your location. By checking the weather daily, you can plan your irrigation schedules and decide when to plant or harvest.
Pro Tip: Many smartphones now have built-in weather apps that can send you alerts about sudden temperature drops or rain, which can help you act quickly to protect your crops.
Adapting to Unpredictable Weather Patterns
Dry-season farming doesn’t mean the weather is always predictable. Sometimes the harmattan winds can be harsher than expected, or there could be unexpected rainfall. So, how do you handle that? Always be flexible with your plans. If rain is forecast, adjust your irrigation schedules and monitor for pests and diseases that thrive in humid conditions.
Common Mistakes to Avoid in Dry-Season Farming
Farming isn’t always smooth sailing, especially in the dry season. Here are some mistakes that many beginners make—and how you can avoid them.
Overwatering or Underwatering
Watering too much can drown your crops, while underwatering can cause them to wither. Always monitor soil moisture carefully and adjust your irrigation system accordingly. Drip irrigation is great for preventing this.
Planting Too Early or Too Late
Timing is everything in the dry season. If you plant too early, you risk losing crops to unexpected rainfall. If you plant too late, you might not have enough time for them to mature. Stick to planting times like November to December, before the intense heat kicks in.
Neglecting Pest Control
Pests are an unfortunate reality of farming, especially in the dry season when they tend to migrate towards crops for food. Regularly check your crops and apply natural pest controls like neem oil or insecticidal soaps to keep pests at bay.
Post-Harvest Handling: Keep Your Crops in Good Shape
You’ve worked hard, and now it’s time to harvest your crops. But the work doesn’t stop there! Proper post-harvest handling ensures you don’t lose your precious yield.
Proper Drying Techniques
After harvesting crops like maize or tomatoes, dry them properly to prevent spoilage. For maize, leave the cobs to dry in a shaded, well-ventilated area. For tomatoes, you can use a solar dryer or simply air-dry them if you don’t have access to specialized equipment.
Storage Tips
Store your dried crops in airtight containers or sacks. For groundnuts, ensure that the peanuts are fully dried before storage to avoid mold and rot. Keep them in a cool, dry place, and if possible, use sealed storage bags to prevent pest infestations.
Frequently Asked Questions (FAQs) about List Of Dry Season Crops In Nigeria
1. What is the best time to plant dry-season crops in Nigeria?
The best time to plant dry-season crops in Nigeria is generally between November and December. During this time, the rains have mostly subsided, and the soil is still fertile enough to support early planting before the intense heat of the dry season kicks in. This timing also allows the crops to mature before the peak of the dry season (usually around March and April).
2. Do I need irrigation if I’m farming during the dry season?
Yes! Irrigation is crucial during the dry season when rainfall is scarce. Without adequate water, your crops may not survive or thrive. You can use drip irrigation, sprinkler systems, or even flood irrigation depending on your farm size and available water sources. Drip irrigation is the most efficient, delivering water directly to the plant roots, reducing wastage, and promoting healthy growth.
3. Can I grow crops without irrigation in the dry season?
Growing crops without irrigation during the dry season is challenging but not impossible, especially if you have crops that are more drought-tolerant, like sweet potatoes or millets. However, without irrigation, you risk your crops drying out due to the lack of rain. It’s always a good idea to have a backup water source or at least be prepared to water your crops manually.
4. What are some drought-tolerant crops I can grow during the dry season?
Several crops are well-suited for the dry season and require less water. These include:
- Millets: A staple in many parts of Nigeria, they’re drought-resistant and grow well in hot, dry conditions.
- Cowpeas: Perfect for poor soil conditions, cowpeas thrive in the dry season and also improve soil fertility.
- Sweet Potatoes: A hardy crop that can survive with minimal water once established.
- Groundnuts: Known for being drought-tolerant and performing well under the hot sun.
5. How do I protect my crops from the intense heat during the dry season?
Protecting your crops from extreme heat is crucial. Here’s what you can do:
- Mulching: Cover the soil around your plants with organic materials (like leaves or straw) to retain moisture and keep the roots cool.
- Shade nets: For heat-sensitive crops like tomatoes, using shade nets can reduce direct sun exposure, helping prevent sunscald.
- Timely watering: Water your crops in the early morning or late evening when the temperatures are lower to avoid water loss due to evaporation.
6. How do I manage pests during the dry season?
Pests love dry conditions because crops become stressed and easier targets. To control pests naturally:
- Neem oil: A natural pesticide that can repel many common pests without harming the environment.
- Insecticidal soaps: These are effective against a range of insects, including aphids and whiteflies.
- Crop rotation: Change the location of your crops each season to prevent pests from building up in the soil.
7. What are some common mistakes to avoid in dry-season farming?
- Overwatering or underwatering: It’s easy to either overdo or neglect watering. Invest in a good irrigation system and monitor soil moisture regularly.
- Ignoring soil health: Dry-season crops often demand more from the soil, so be sure to fertilize and mulch adequately to keep the soil healthy.
- Planting too late: Delaying planting can result in crops not maturing before the worst of the dry heat hits. Stick to your planting schedule.
8. Can I grow multiple crops in the dry season?
Yes, you can grow multiple crops, but you’ll need to plan carefully to ensure each crop gets enough resources, such as water and nutrients. Companion planting (growing crops that benefit each other) can be helpful. For instance, planting legumes (like beans or cowpeas) alongside maize can help fix nitrogen in the soil, benefiting both crops. Just be sure not to overcrowd your crops, as they may compete for water and sunlight.
9. How can I store my dry-season crops for later use?
Proper storage is key to ensuring your hard work doesn’t go to waste. Here are a few tips:
- Drying: After harvesting crops like tomatoes or maize, ensure they are fully dried before storage to avoid mold and spoilage.
- Airtight containers: Store dried crops like beans and groundnuts in airtight containers or sacks to keep pests out and preserve freshness.
- Cool, dry storage: Keep your crops in a cool, dry place, away from direct sunlight, to prevent them from deteriorating.
10. Is it possible to farm sustainably in the dry season?
Absolutely! Sustainable farming methods are not only possible but essential for long-term productivity. Here are some ways to farm sustainably during the dry season:
- Rainwater harvesting: Collect rainwater during the wet season to use for irrigation during the dry months.
- Agroforestry: Planting trees alongside crops can help improve soil quality and protect your crops from harsh winds and sun.
- Integrated Pest Management (IPM): Use natural methods to control pests, reducing your reliance on harmful chemicals.
Conclusion: Start Your Dry Season Farming Now!
If you’ve ever wondered how to make the most out of Nigeria’s dry season, now you know! Growing crops like tomatoes, pepper, onions, and watermelon is not only possible but profitable when done right. With proper planning, irrigation, and pest management, you can maximize your harvest and secure a steady income during the dry season.
Ready to take the plunge? Start by choosing one of these crops, and follow the step-by-step guides above to make your farming venture a success. Whether you’re a beginner or an experienced farmer, the dry season is your opportunity to shine!
Got any questions, or want to share your farming experiences? Drop a comment below! Let’s talk about how we can all make dry-season farming work for us.
